How to Deploy Infisical to Manage Application Secrets on Koyeb
Introduction
Infisical is an open-source secret management platform to securely store and manage secrets for both users and applications. It integrates easily with many different application stacks and can replace environment variable-based secret workflows with simple API driven secret management. With advanced features like continuous monitoring and pre-commit checks, Infisical can help you prevent leaks and identify actions that might expose sensitive data.
In this tutorial, we will show how to deploy an Infisical instance on Koyeb. We provision a Koyeb PostgreSQL database to store the application data, set up an Aiven Redis database to manage session data and perform background tasks, and configure Mailgun to handle emails. We will deploy Infisical using these components and demonstrate how to manage secrets with it for your applications.
Be sure to modify all of the environment variable values to reflect your own data. You can consult this guide if you need additional information on appropriate values.
Requirements
To successfully follow and complete this guide, you need:
- A Koyeb account to provision the PostgreSQL database and to build and deploy the Infisical application.
- An Aiven account to provision the Redis database.
- A Mailgun account to provide account-based email services for the application.
- Docker installed on your local computer run the initial database migrations.
Steps
To complete this guide and deploy an Infisical application, you'll need to follow these steps:
- Provision a PostgreSQL database on Koyeb
- Provision a Redis instance on Aiven
- Set up the Mailgun SMTP service
- Connect to the database to run Infisical migrations
- Get the Infisical image version number
- Deploy Infisical to Koyeb
- Create an administration account
- Configure a project and secrets
- Access secrets for your applications
Provision a PostgreSQL database on Koyeb
Infisical uses a PostgreSQL database to store its application data. Since we will be deploying the application to Koyeb, we will create a database using Koyeb's PostgreSQL service, which includes a free tier.
To deploy a new PostgreSQL database, on the Overview tab of the Koyeb control panel, click Create Database Service. Choose a name for the service and choose the region closest to you or your users.
Once the database is provisioned, click the copy icon associated with psql to save the connection details for later.
Provision a Redis instance on Aiven
Infisical uses Redis for session management and to help coordinate background tasks. We will use Aiven Redis for this since they have a generous free tier.
To begin, log in to your Aiven account and follow these steps:
- In the upper-right corner, click Create service.
- On the service selection page, click Redis.
- Select Free plan to use a free Aiven service.
- Select the region closest to where you plan to run Infisical.
- Choose a name for the service or confirm the default choice.
- Click Create free service to initialize the new Redis store.
Once the service is available, click the copy icon associated with the Service URI to save the connection details for later.
Set up the Mailgun SMTP service
Next, you need to copy the SMTP information for your Mailgun account. We will configure Infisical to handle authentication and account-based email flows using this provider.
To begin, log into your Mailgun account. In the side navigation pane, open the Sending menu. Next, click the Overview sub-menu item.
Mailgun offers sandbox domains to test its functionality. These are useful, but restricted to sending emails only to previously authorized email addresses. We can use this to test the mail delivery with Infisical for free. On the right sidebar of the Overview page, enter the email address you want to send test emails to in email address input field of the Authorized Recipients section and click the Save Recipient button.
Mailgun will send a verification email to the provided address. In the verification email, click the I Agree button to complete the authorization process. If you refresh the page in Mailgun, you see that the target email address is now marked as verified.
From this same page, click the Select box associated with "SMTP" to see the information you need to send email using your Mailgun account. The information related to using SMTP with your Mailgun account will be displayed. Copy and save the following information:
| Mailgun SMTP info | Infisical env var | Example |
|---|---|---|
| SMTP hostname | SMTP_HOST | smtp.mailgun.org |
| Username | SMTP_USERNAME | postmaster@sandboxbac59f0e6dac45cdab38e53aee4e1363.mailgun.org |
| Password | SMTP_PASSWORD | e627704d99111f00c7aedf3805961383-262b123e-66b6979f |
Connect to the database to run Infisical migrations
Now that the Infisical database is up and running, we can begin to configure it for the application. Before running the Infisical application itself, we must apply the relevant migrations for the release we are using to the database.
To do this, pull the latest image built for PostgreSQL (instead of the legacy MongoDB implementation):
docker pull infisical/infisical:latest-postgres
Run the migrations for the Infisical version you pulled passing along your PostgreSQL connection string with ?sslmode=require appended as the DB_CONNECTION_URI environment variable:
docker run --env DB_CONNECTION_URI="<YOUR_POSTGRESQL_CONNECTION_STRING>?sslmode=require" infisical/infisical:latest-postres npm run migration:latest
Docker will run the image with the PostgreSQL connection information and execute the migration:latest script defined in the image's package.json file. This will apply all of the necessary migrations to your database in the correct order, ensuring that it has the appropriate objects and structures to run Infisical.
You can verify this worked as expected by connecting to your database with the psql client and listing the available tables:
psql <YOUR_POSTGRESQL_CONNECTION_STRING> -c "\dt"
Get the Infisical image version number
When we ran the database migrations, we pulled the latest-postgres tag to get the most up-to-date version of the software. We must ensure that the version of the application we run matches the migrations we applied. To do so, we need to disambiguate the latest-postgres tag and find the version-specific tag for the same image.
We can do this by finding the SHA-256 hash of the latest-postgres image we pulled. Run the following command to assign the image digest to a local DIGEST environment variable:
export DIGEST="$(docker image list --digests infisical/infisical | grep latest-postgres | awk '{print $3;}')"
Next, if you have jq installed, you can curl the Docker Hub API for all of the Infisical image tags and select the ones with matching digests:
curl -s https://hub.docker.com/v2/namespaces/infisical/repositories/infisical/tags | jq -r '.results[] | select(.digest == "'$DIGEST'") | .name'
The output will look something like this:
v0.64.0-postgres
049df6a
latest-postgres
In our case, we can see that v0.64.0-postgres is an alternative, stable tag for the same release we ran.
If you don't have jq available, you can manually search the Infisical tags on Docker Hub to find the SHA-256 digest that matches the digest you found.
When you deploy Infisical to Koyeb, you should use this tag to avoid a version mismatch.
Deploy Infisical to Koyeb
Now that the database is ready and you know which version to run, you can deploy Infisical to Koyeb. On the Overview tab of the Koyeb control panel, click Create Web Service to begin:
-
Select Docker as the deployment method.
-
For the image path, use
docker.io/infisical/infisicalfollowed by the tag that corresponds to the migrations you ran. In the example we used above, this would bedocker.io/infisical/infisical:v0.64.0-postgres. -
In the Environment variables and files section, click Bulk edit to enter multiple environment variables at once. In the text box that appears, paste the following:
SITE_URL=https://{{ KOYEB_PUBLIC_DOMAIN }}
DB_CONNECTION_URI=
REDIS_URL=
SMTP_HOST=
SMTP_PORT=465
SMTP_USERNAME=
SMTP_PASSWORD=
SMTP_SECURE=true
SMTP_FROM_ADDRESS=infisical@{{ KOYEB_PUBLIC_DOMAIN }}
SMTP_FROM_NAME=Infisical
TELEMETRY_ENABLED=false
ENCRYPTION_KEY=
AUTH_SECRET=
Set the variable values to reference your own information as follows:
-
SITE_URL: This is the public URL where the Infisical instance will be available. This is used to form links in emails and for other purposes. Setting it tohttps://{{ KOYEB_PUBLIC_DOMAIN }}will automatically set the correct value.
-
DB_CONNECTION_URI: The connection string to connect to and authenticate with the PostgreSQL database. Set this to thepsqlconnection string you copied from your Koyeb database detail page and append?ssl_mode=requireto the end to force the connection to use TLS/SSL.
REDIS_URL: The connection string for your Redis instance. Use the value copied from the Aiven control panel.SMTP_HOST: The host for the SMTP email provider. Use the SMTP hostname copied from your Mailgun account.SMTP_PORT: The port to use to connect to the SMTP email provider. Though Mailgun shows port 587, the alternative port465is the only one that works with Infisical at time of writing.SMTP_USERNAME: The username to use to authenticate with the SMTP email provider. Use the value copied from your Mailgun account.SMTP_PASSWORD: The password to use to authenticate with the SMTP email provider. Use the value copied from your Mailgun account.SMTP_SECURE: Whether to use TLS/SSL when sending emails. Set this totrue.SMTP_FROM_ADDRESS: The address that will be used in thefromfield when sending emails. Set this to your preferred email address. Usinginfisical@{{ KOYEB_PUBLIC_DOMAIN }}will automatically use your Infisical instance's public domain name.SMTP_FROM_NAME: The human-readable name to use as the sender when sending emails. Choose your preferred name.TELEMETRY_ENABLED: Whether telemetry is enabled on your Infisical instance. Set this totrueorfalseaccording to your preference.ENCRYPTION_KEY: Used for platform encryption and decryption operations. Generate an appropriate key by runningopenssl rand -hex 16locally.AUTH_SECRET: This key is used to sign JSON Web Tokens (JWT). Generate an appropriate key by runningopenssl rand -base64 32locally.
-
-
In the Instance section, select the Eco category and choose eMedium or larger. The Infisical Docker Hub page recommends 1 CPU and 2GB of RAM at a minimum.
-
In the App and Service names section, set your App and Service name to your desired values. The App name will be used as a component in your public Koyeb URL, which uses the following format:
https://<APP_NAME>-<ORG_NAME>-<HASH>.koyeb.app. -
Click Deploy.
Koyeb will pull the image from Docker Hub and run it with the configuration you provided.
Enjoy automatic continuous deployment, global load balancing, real-time metrics and monitoring, autoscaling, and more when your services run on Koyeb.
Create an administration account
Once the deployment is complete, access your Infisical instance by visiting your Koyeb deployment URL. The application URL should have the following format:
https://<YOUR_APP_NAME>-<YOUR_KOYEB_ORG>-<HASH>.koyeb.app
You will be directed to a form to create an initial administration account for your instance:
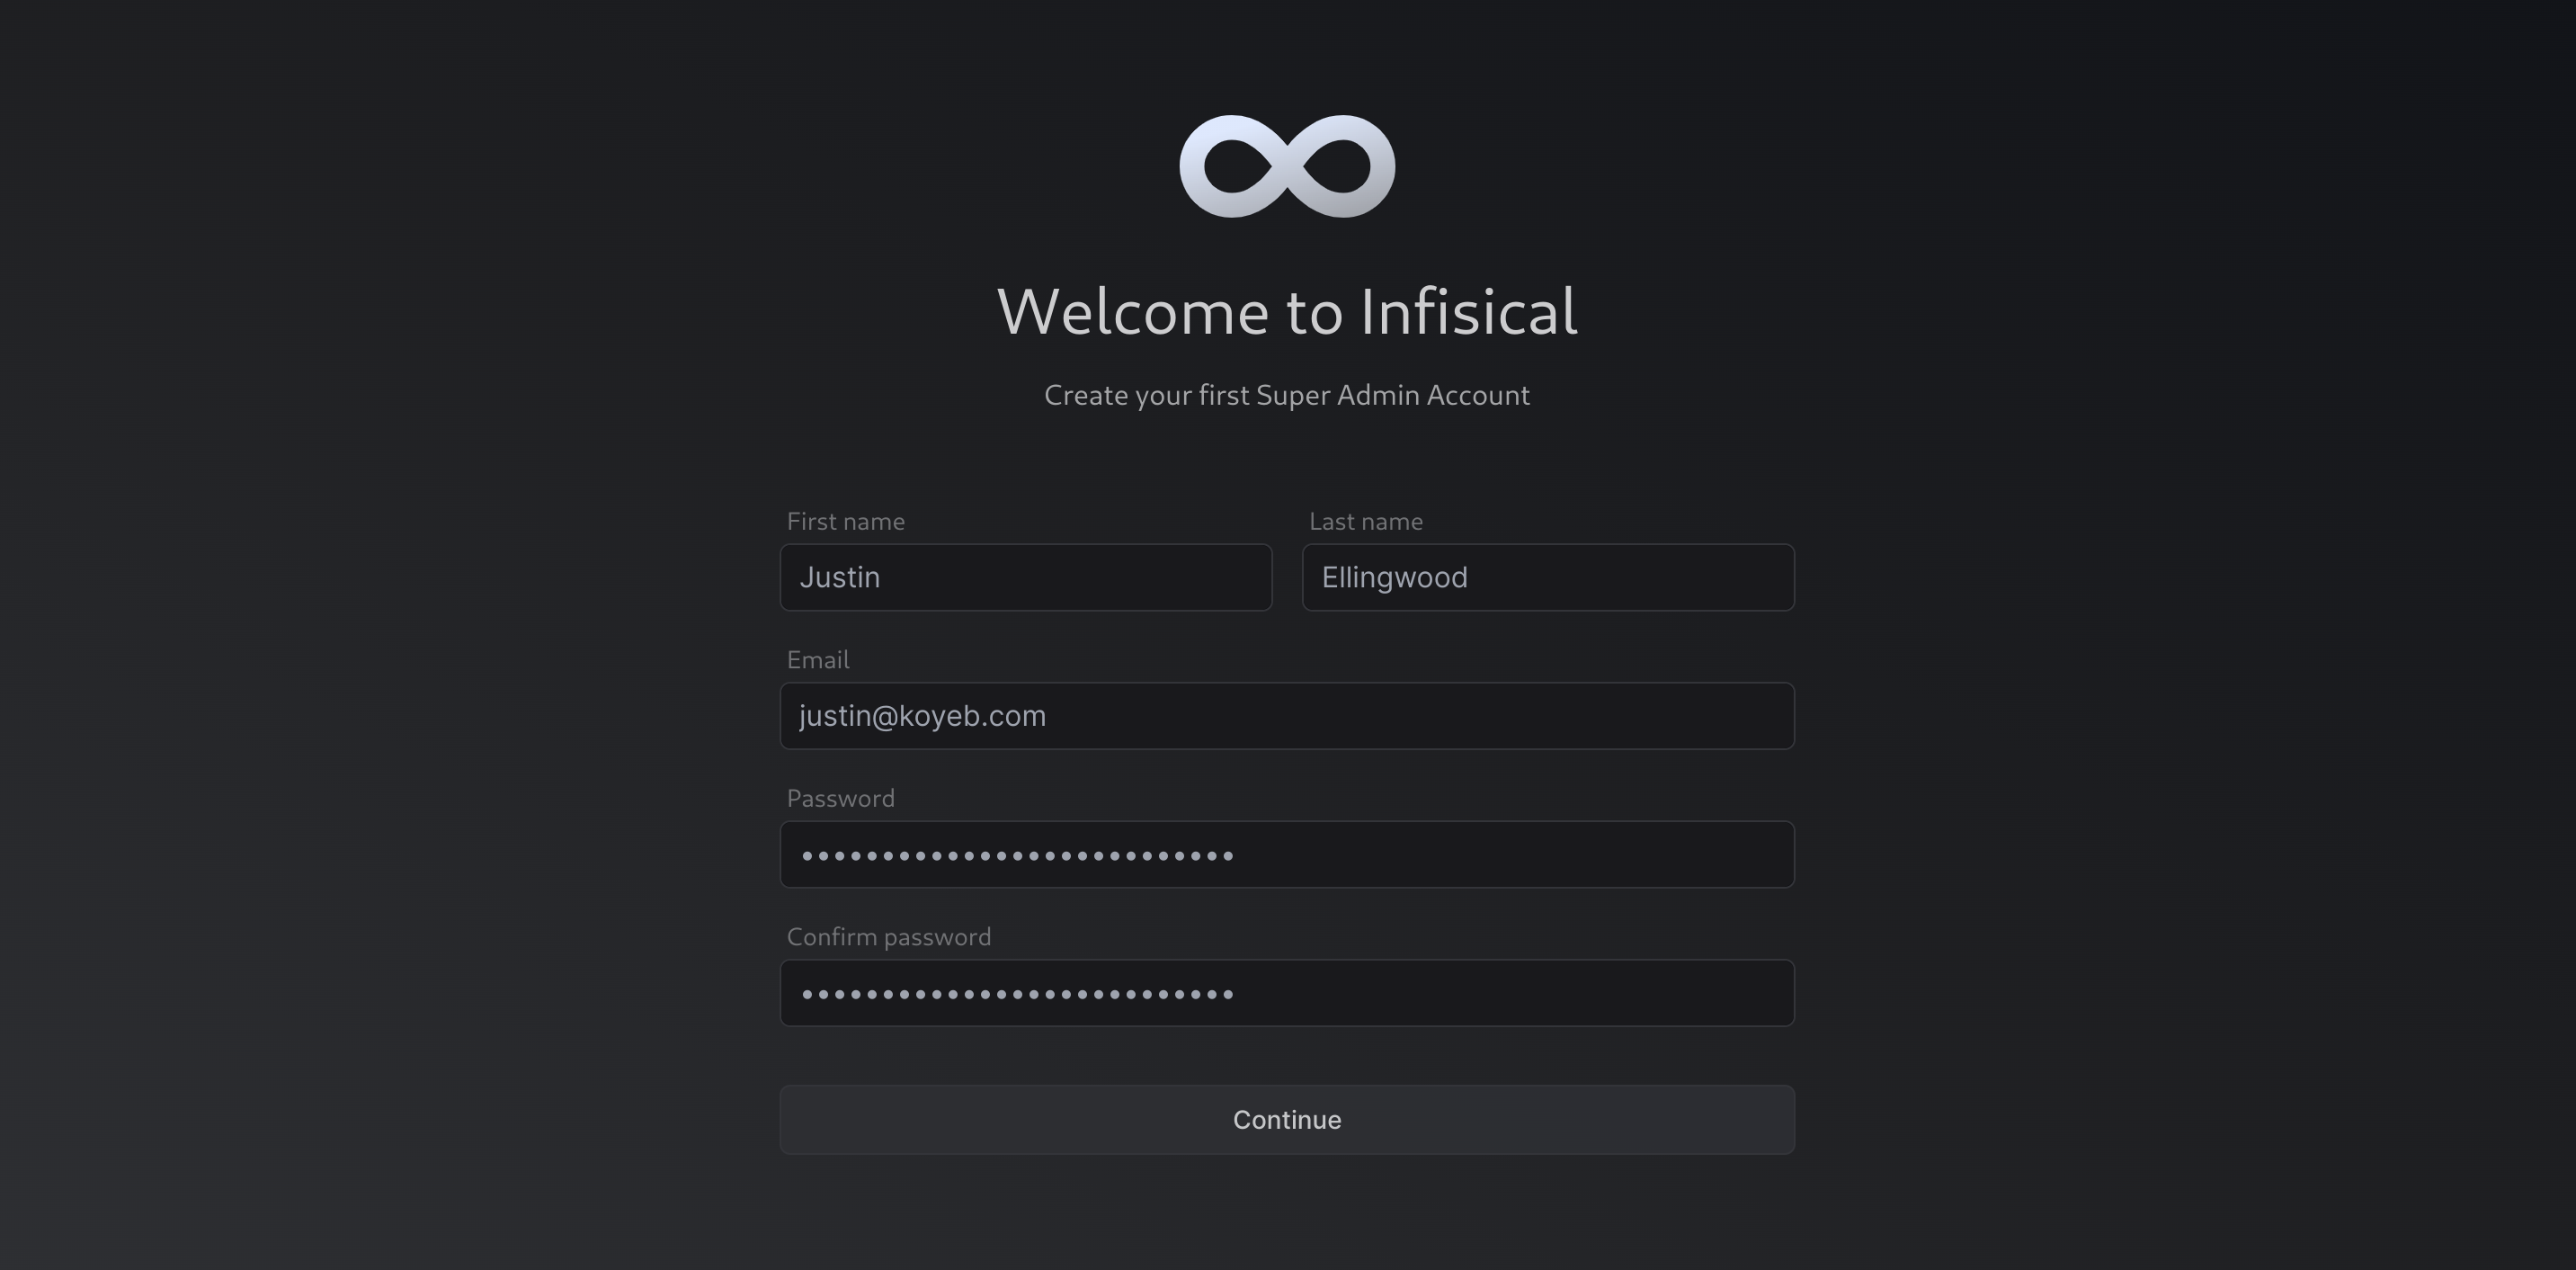
Fill out your information and click Continue to proceed.
You will be prompted to download recovery information that will allow you to recover your account if you get locked out of your account:
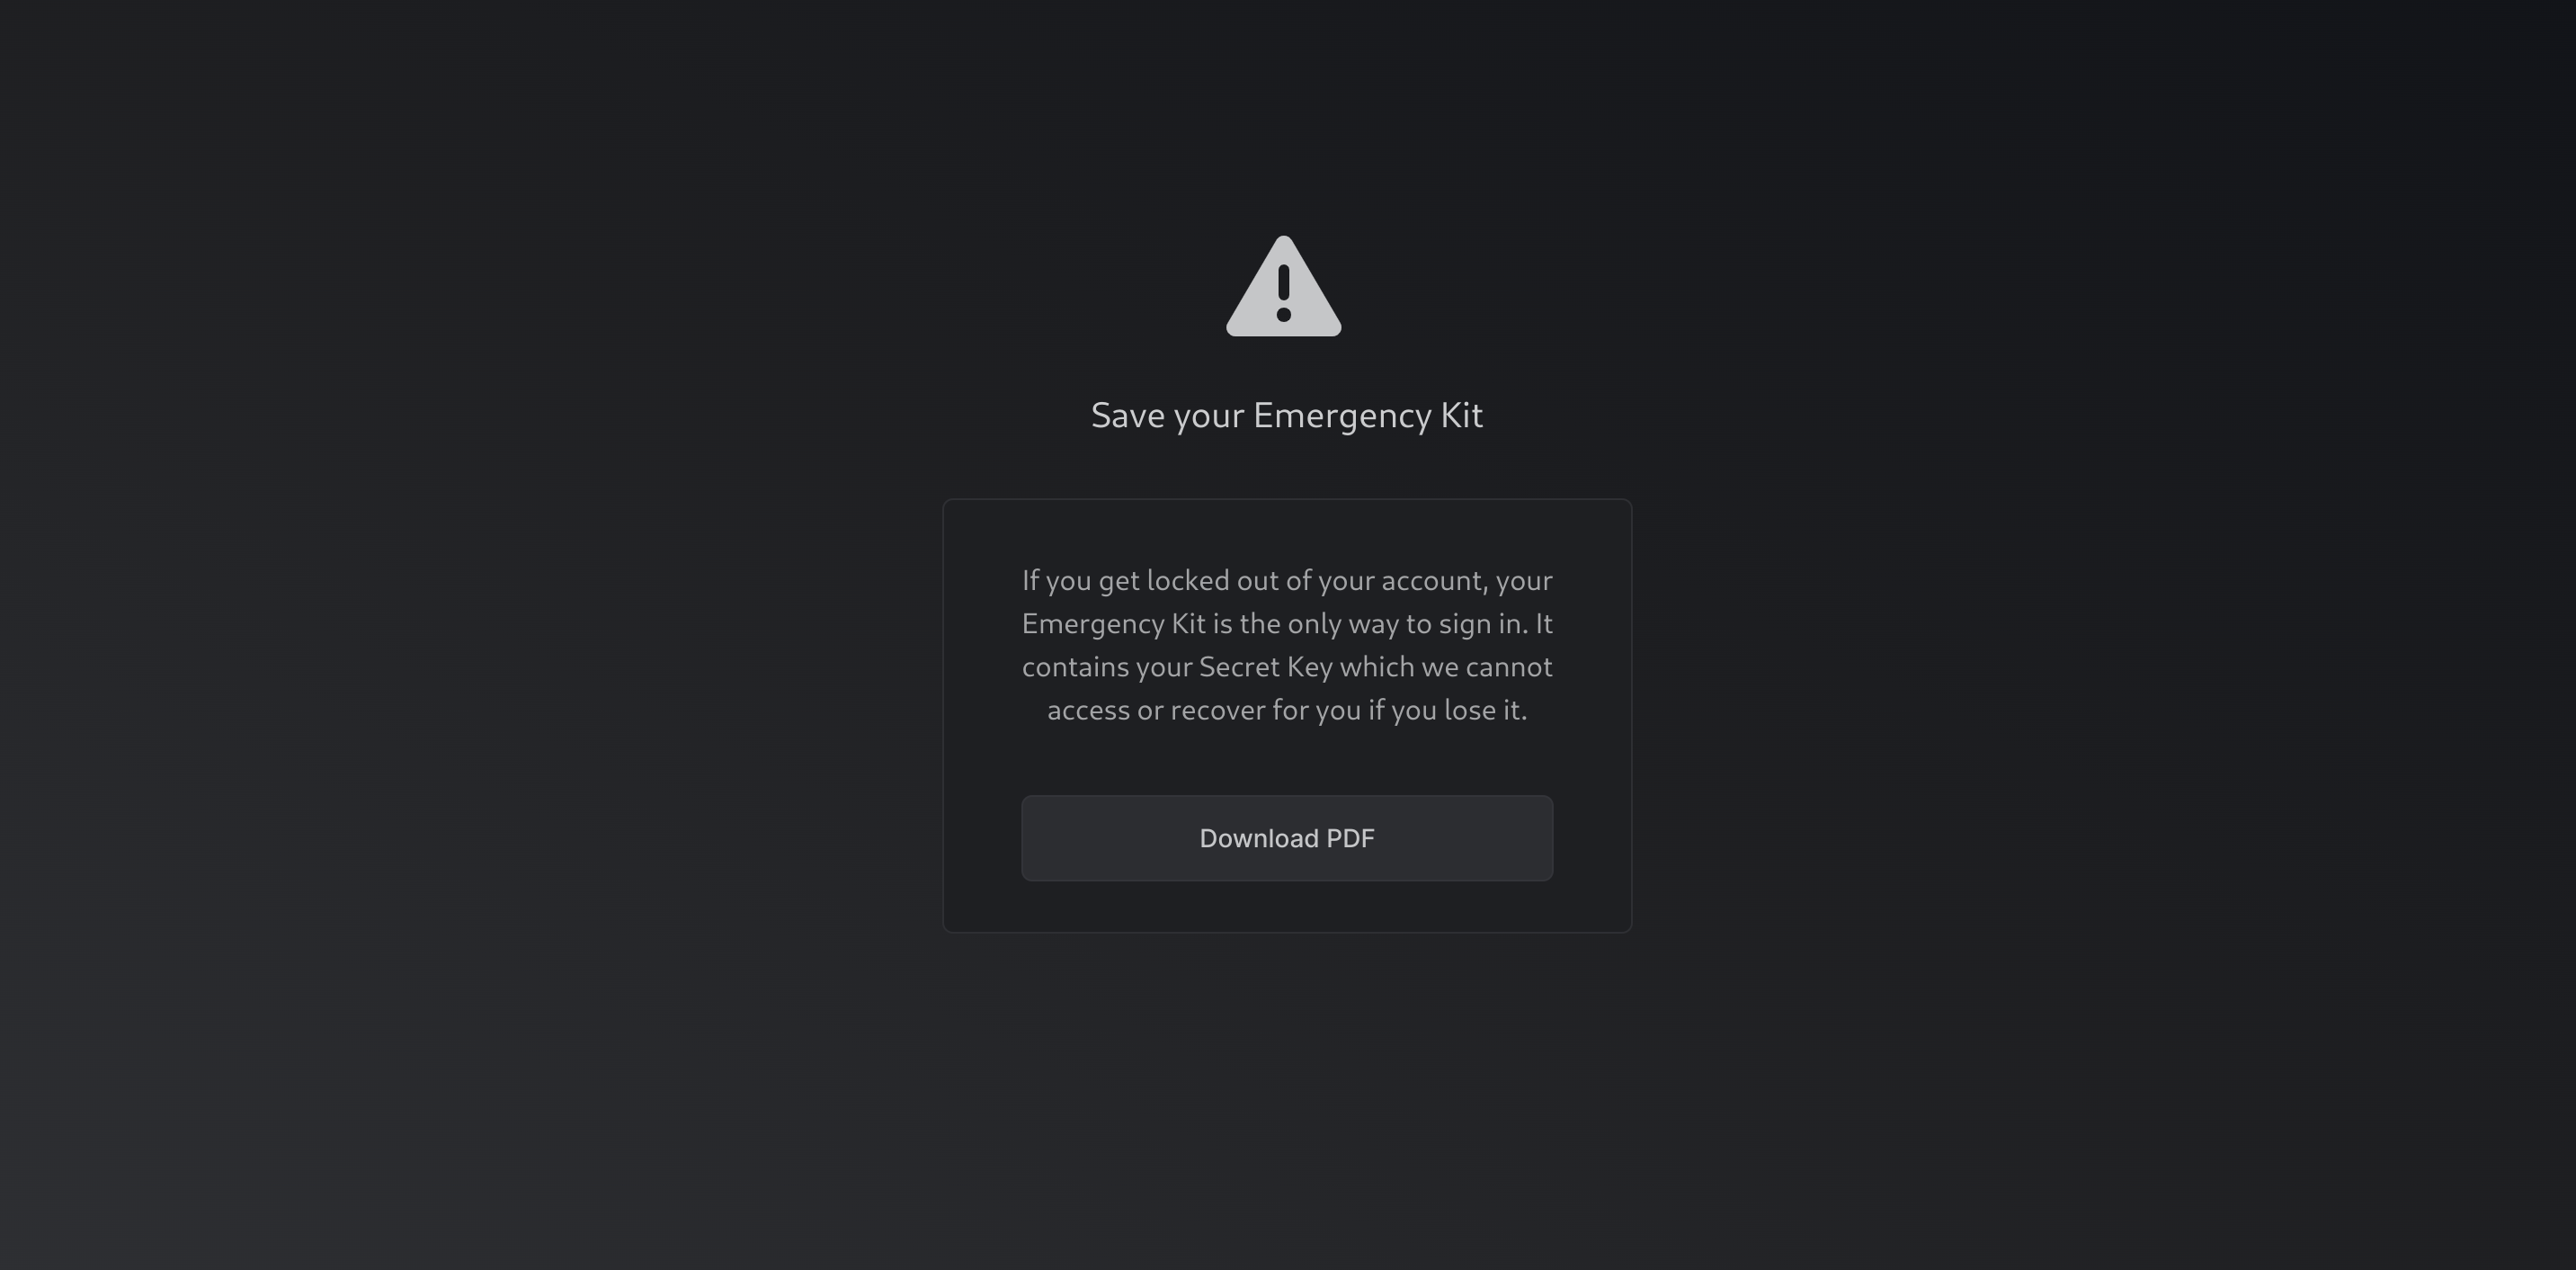
Click Download PDF to continue.
Next, you'll be taken to the Infisical's admin dashboard:
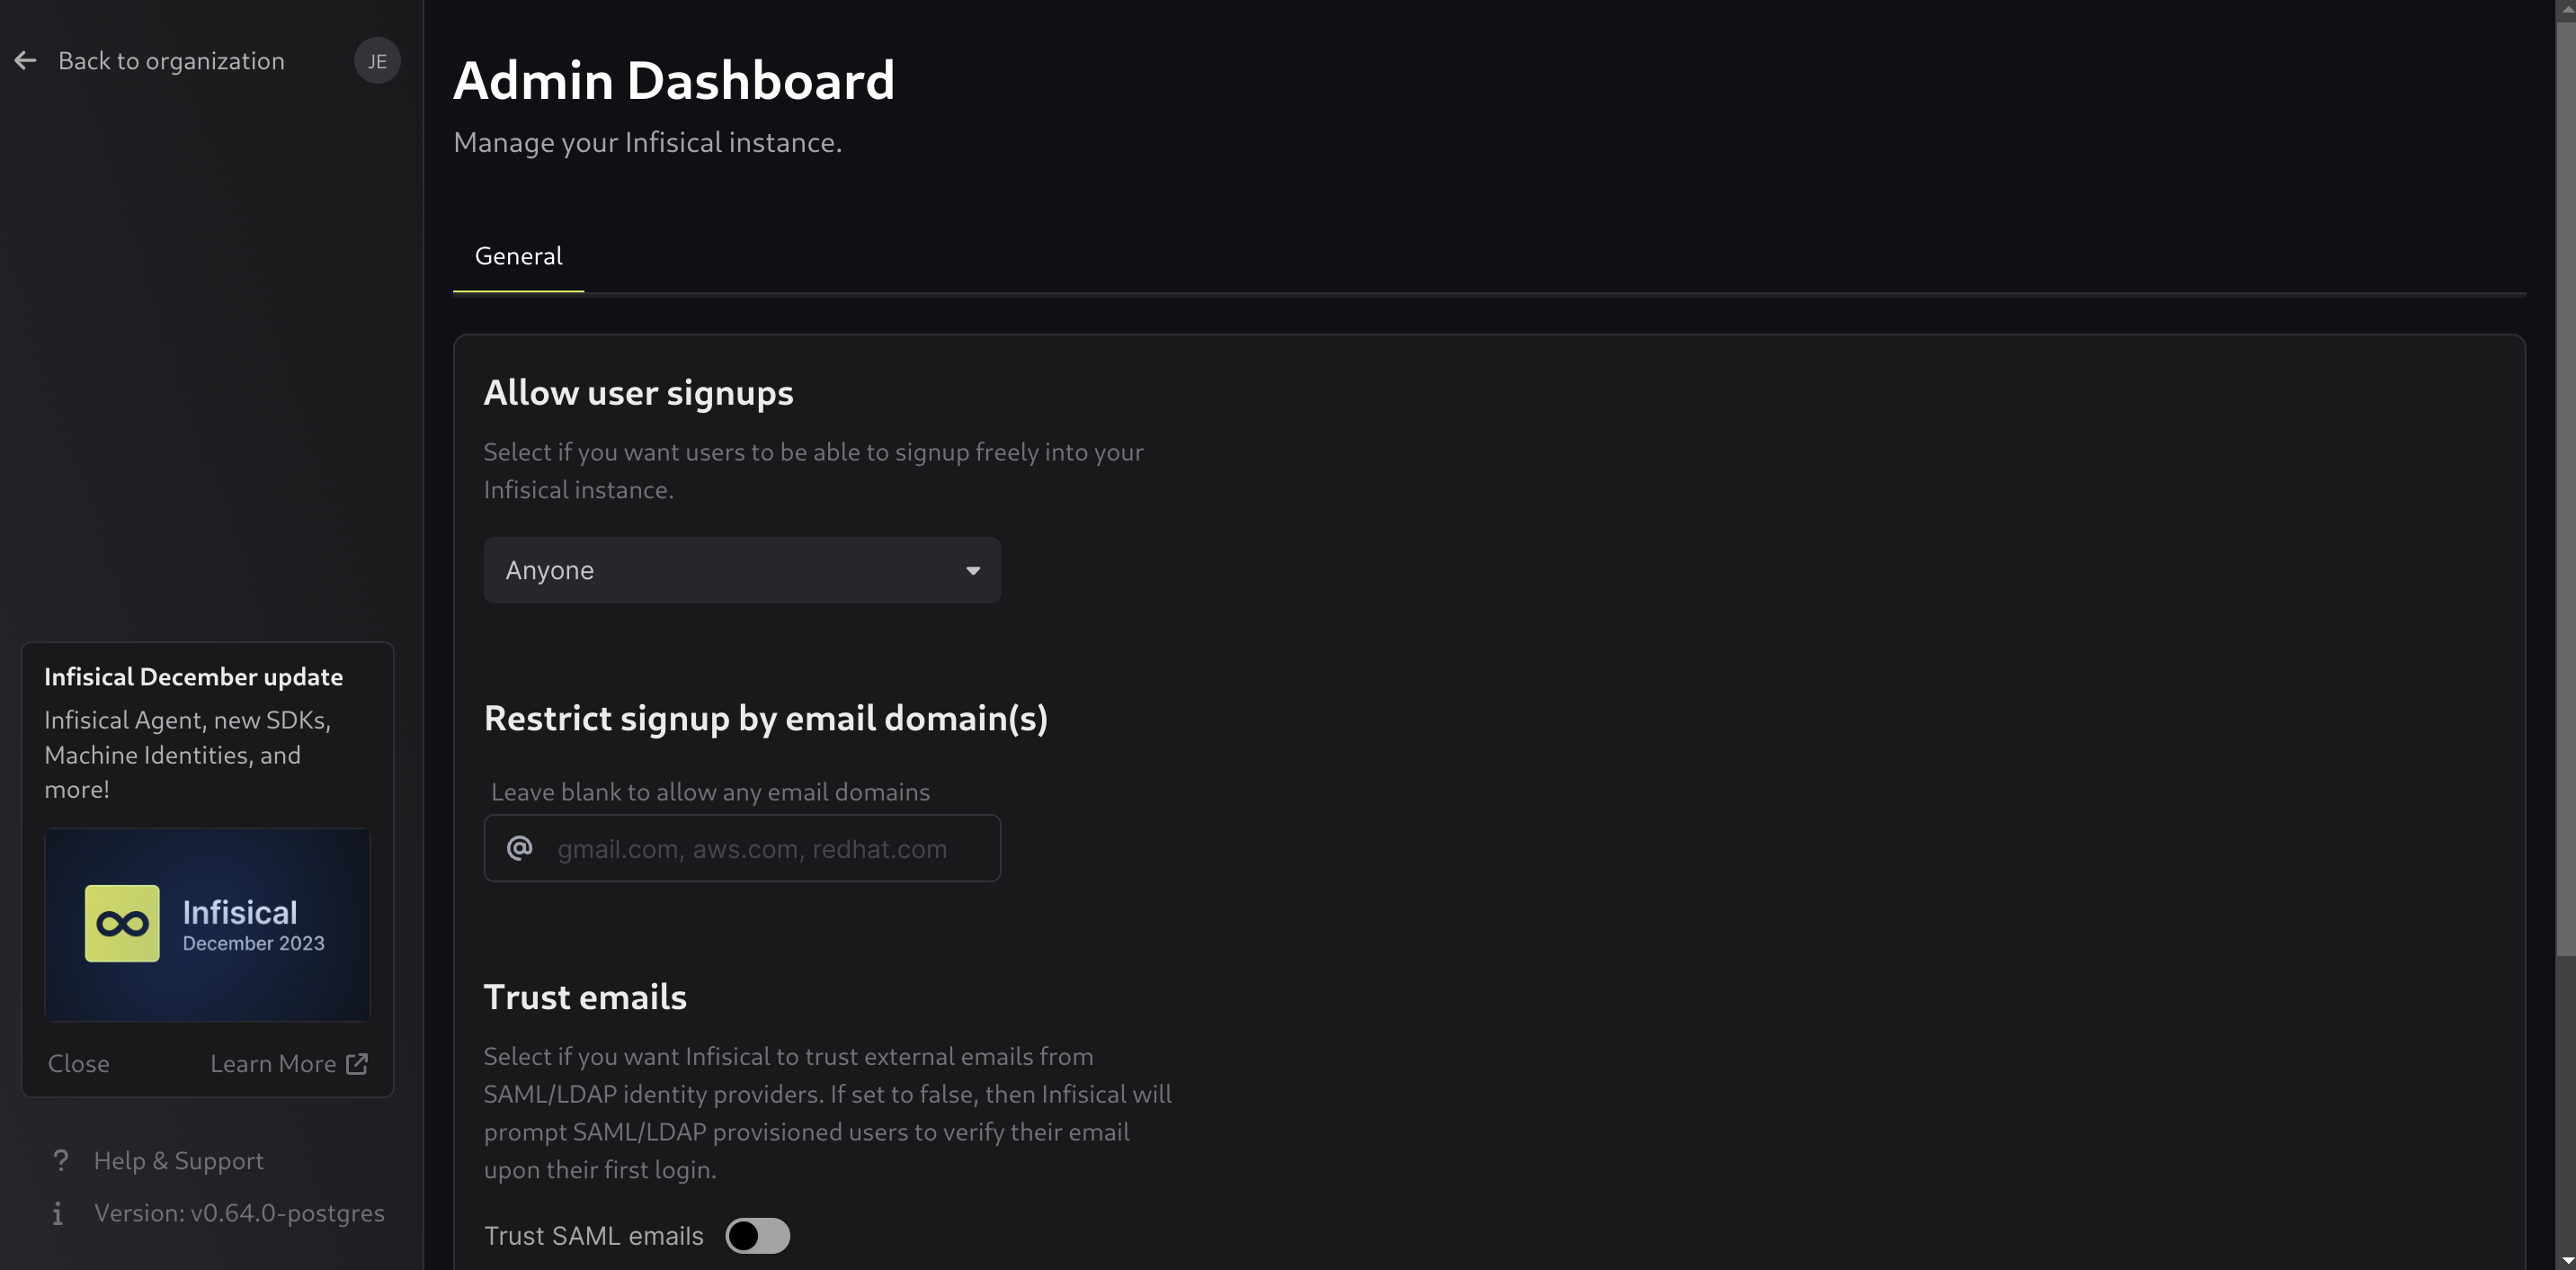
It is a good idea to either disable sign ups or to restrict sign ups to certain email domains if your organization provides email accounts for your own domain.
Click Save when you are finished configuring Infisical's sign up behavior.
Configure a project and secrets
To access the regular Infisical interface, click Back to organization in the upper-left corner. This will take you to the organization's overview page:
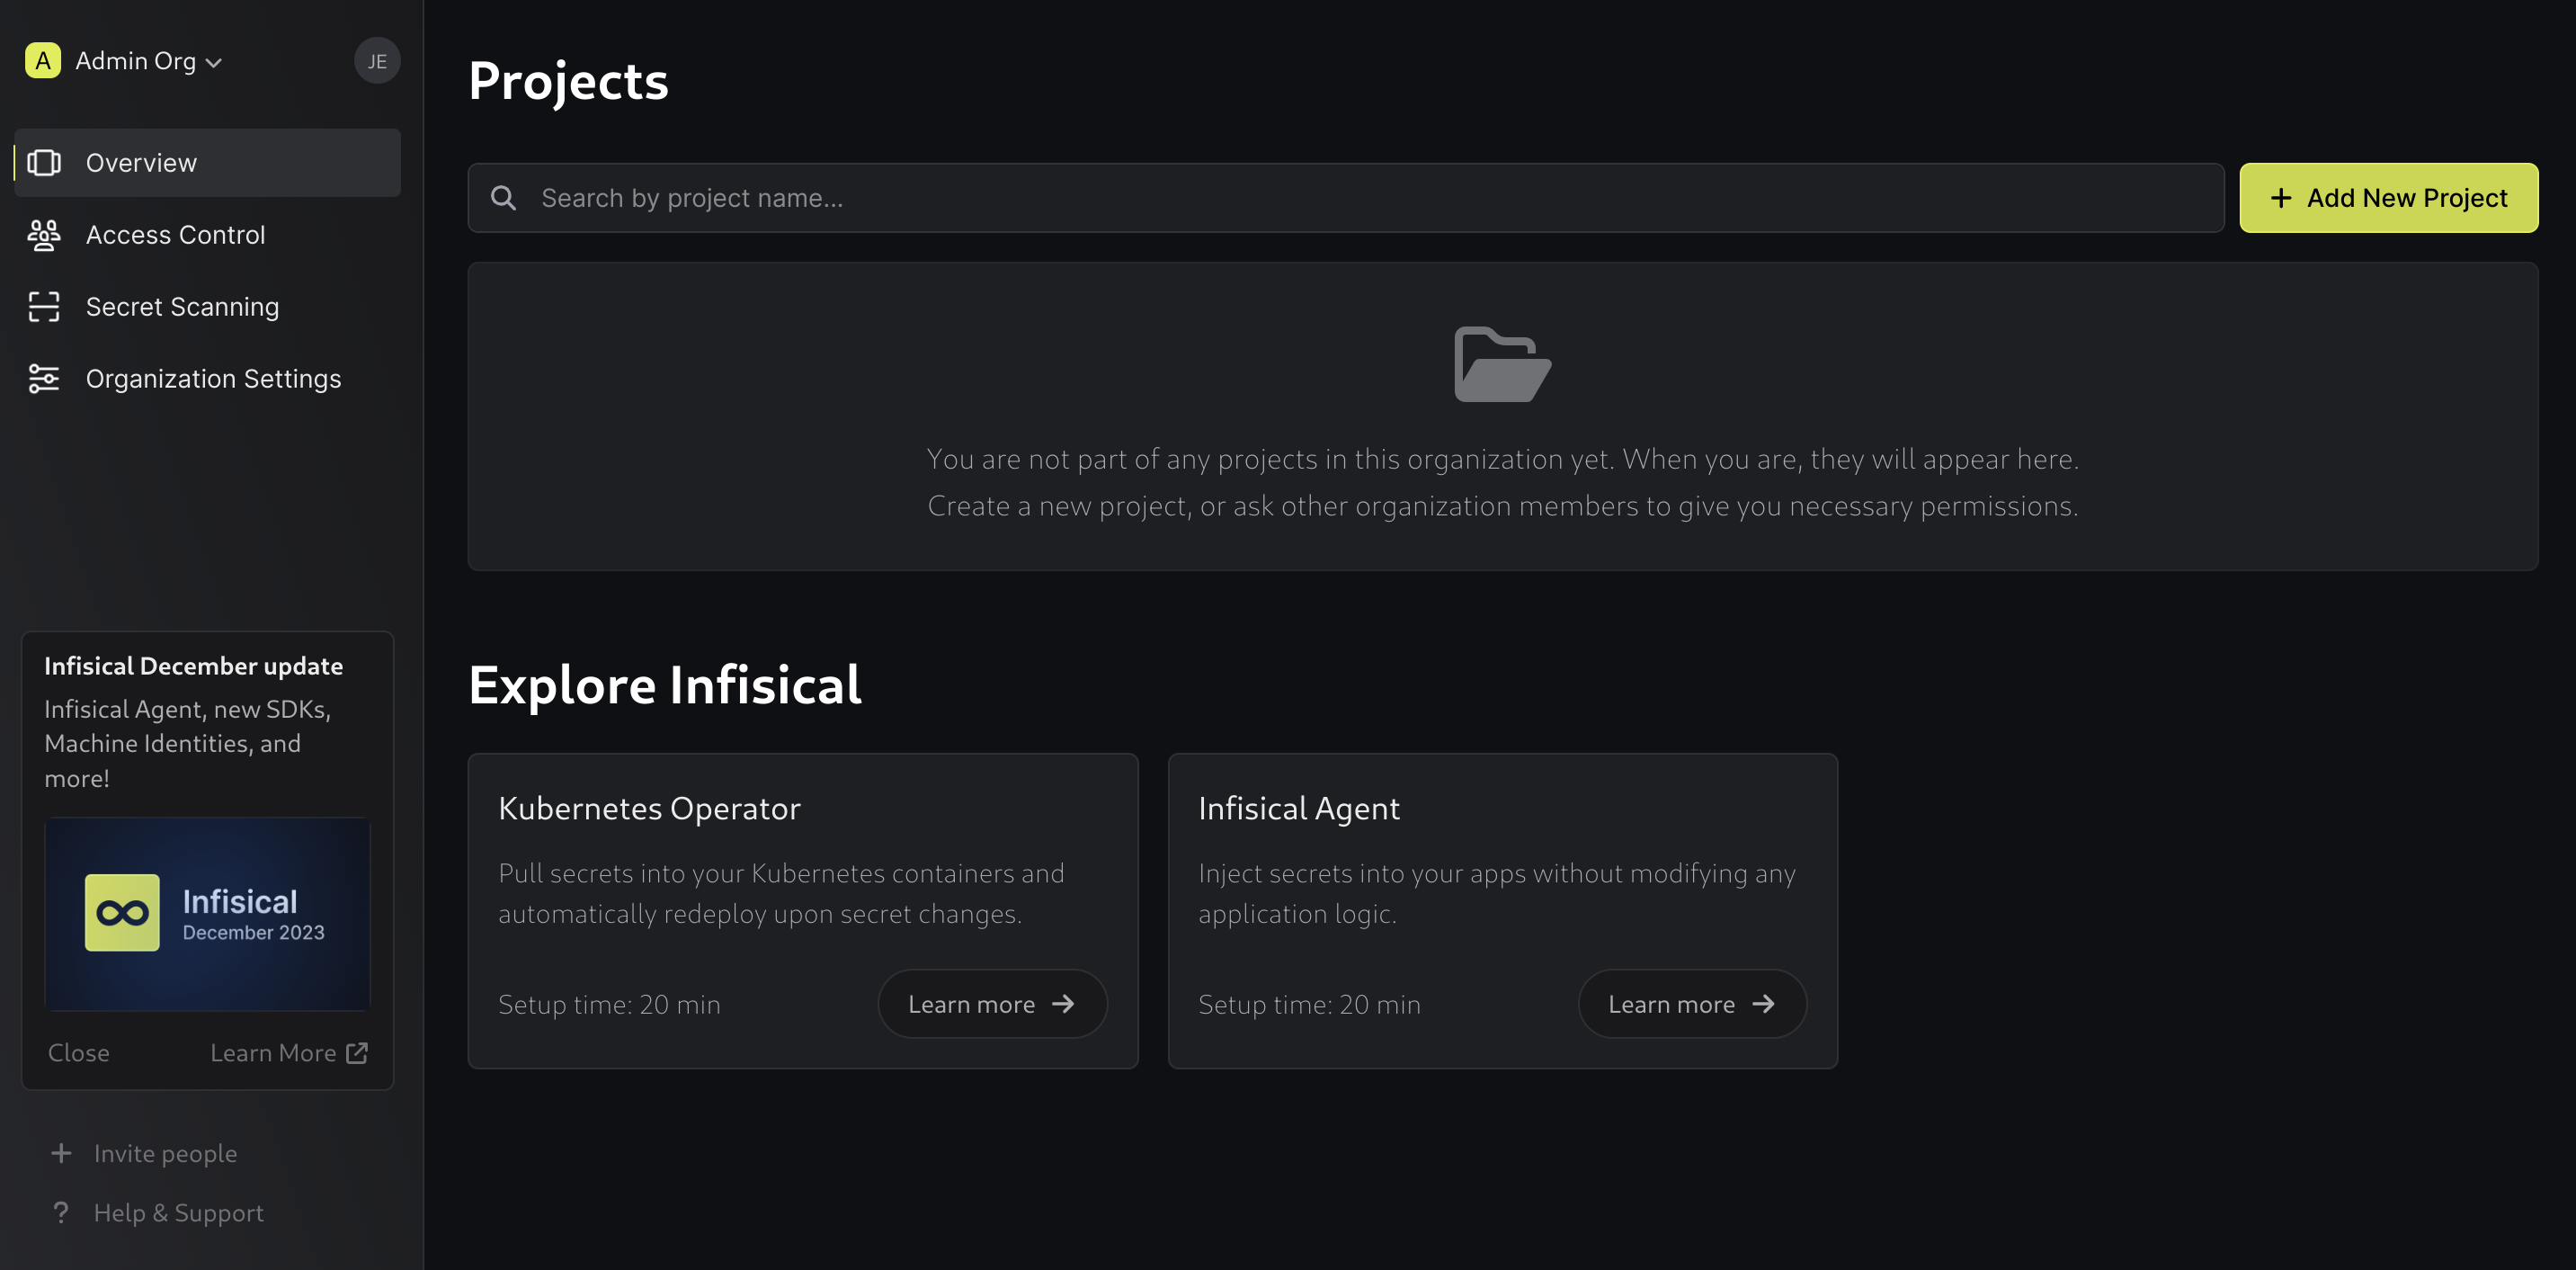
To get started using Infisical, create a new project by clicking Add New Project:

Fill out a name and add members to the project. Click Create Project when you are finished.
You will be redirected to the workspace for your new project:
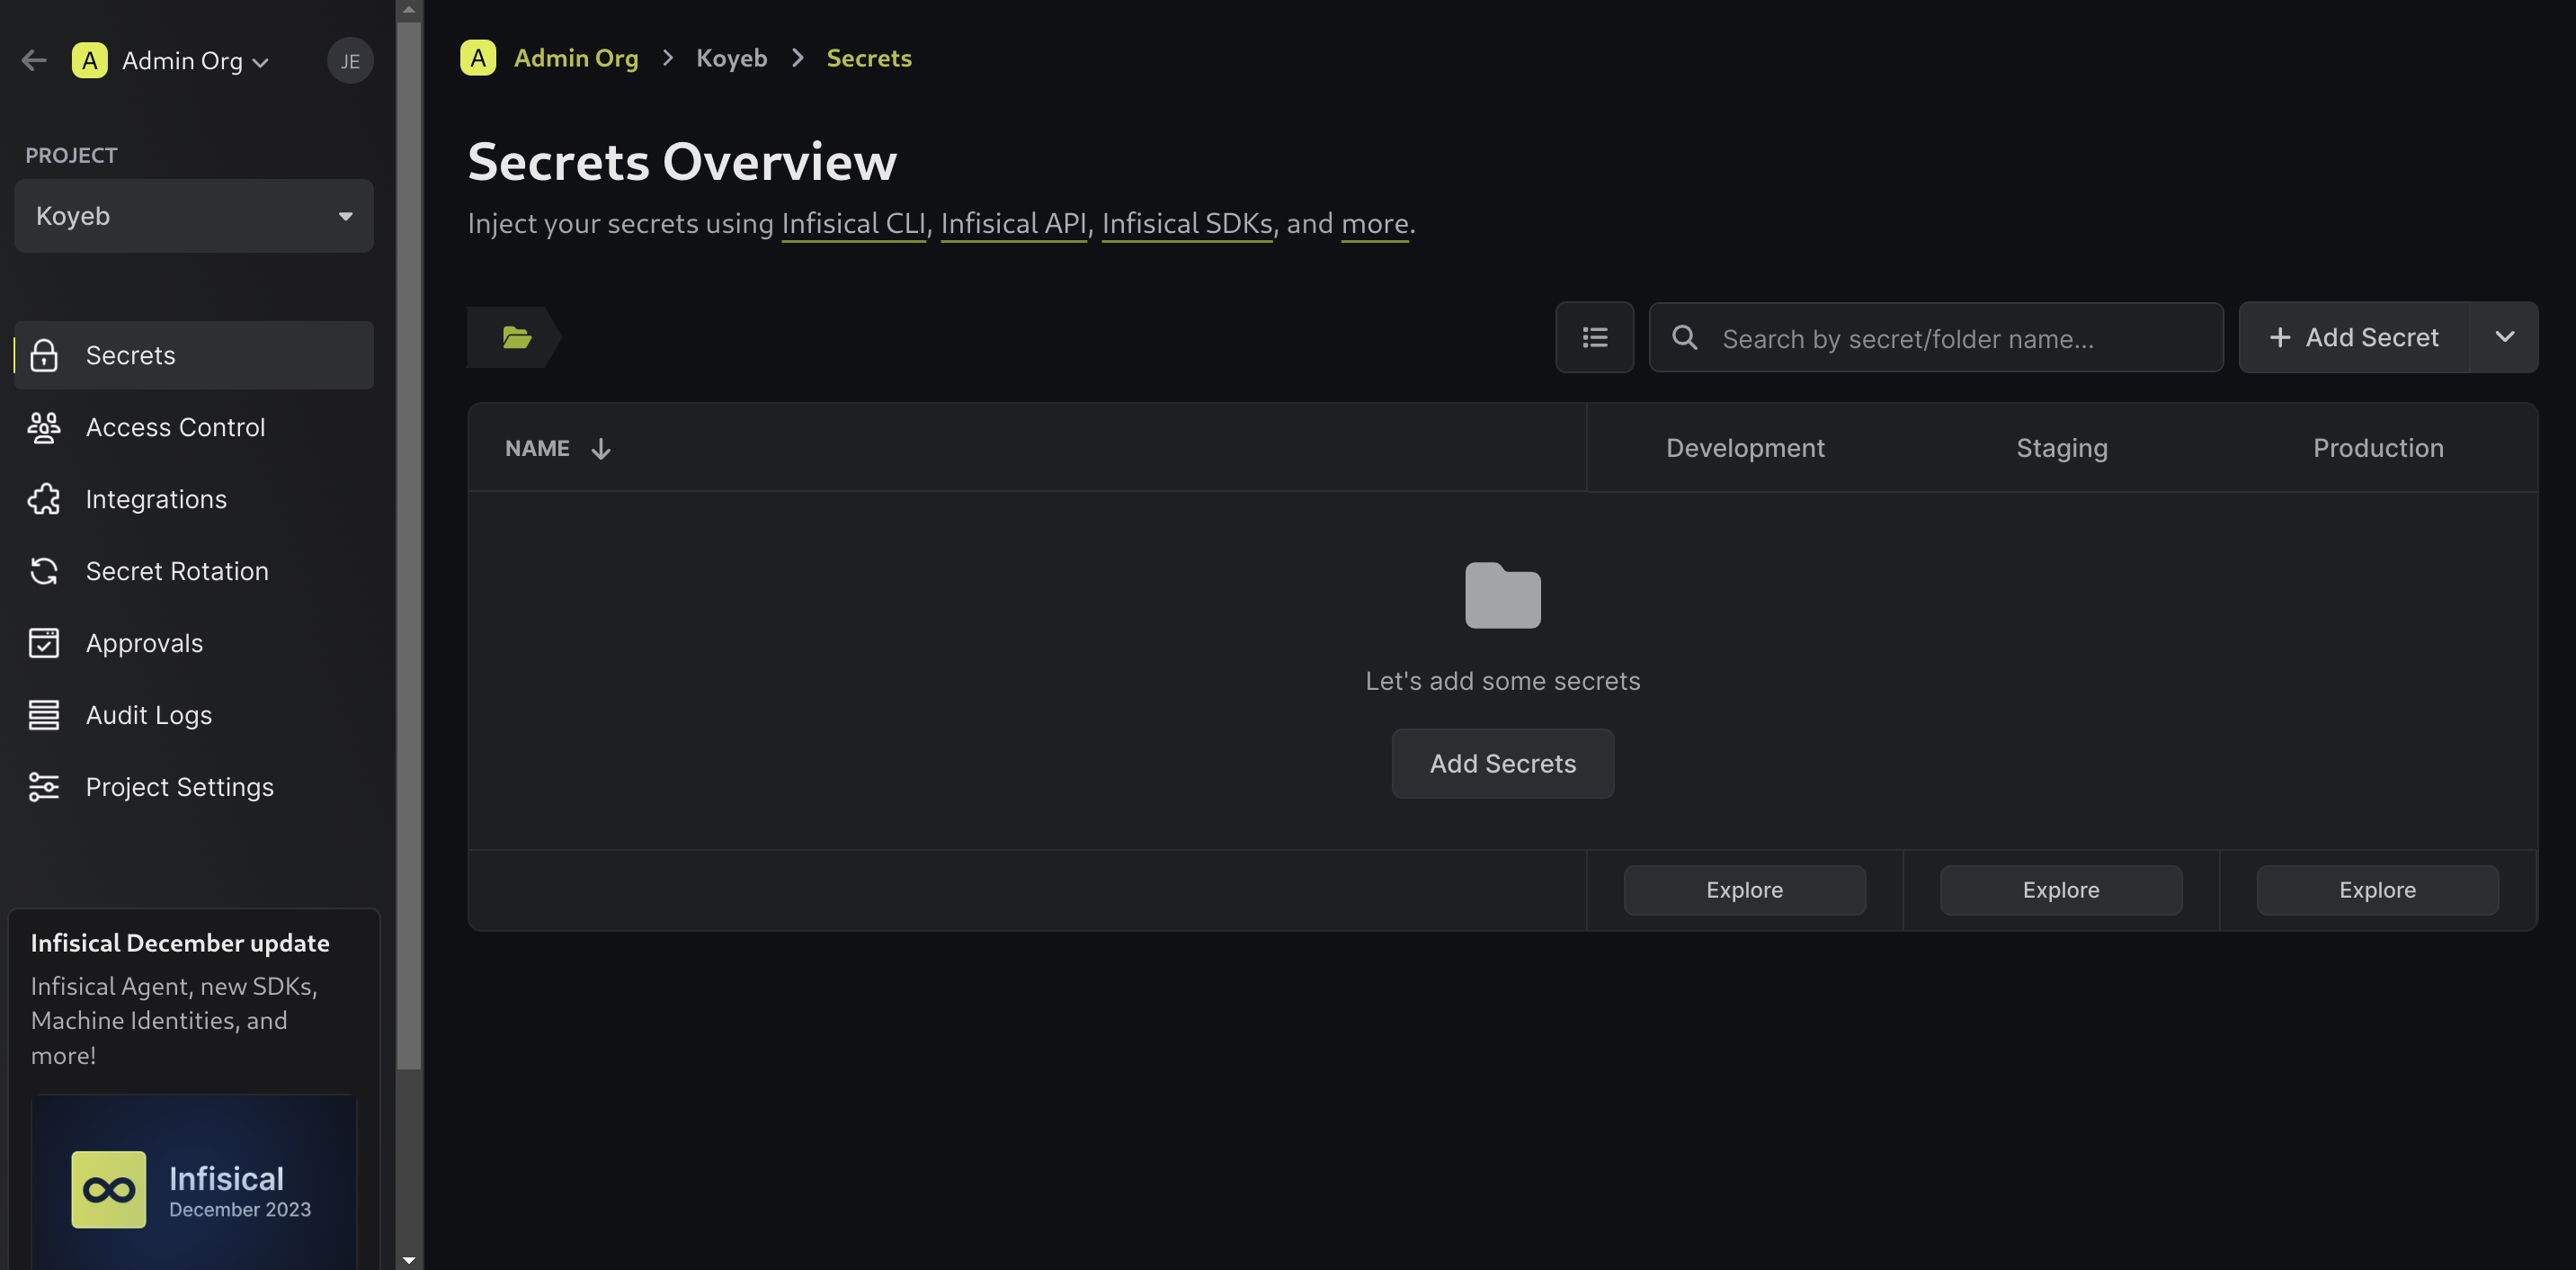
Click Add Secrets to add a new secret. Choose the key and value as well as the environments it should be accessible in:
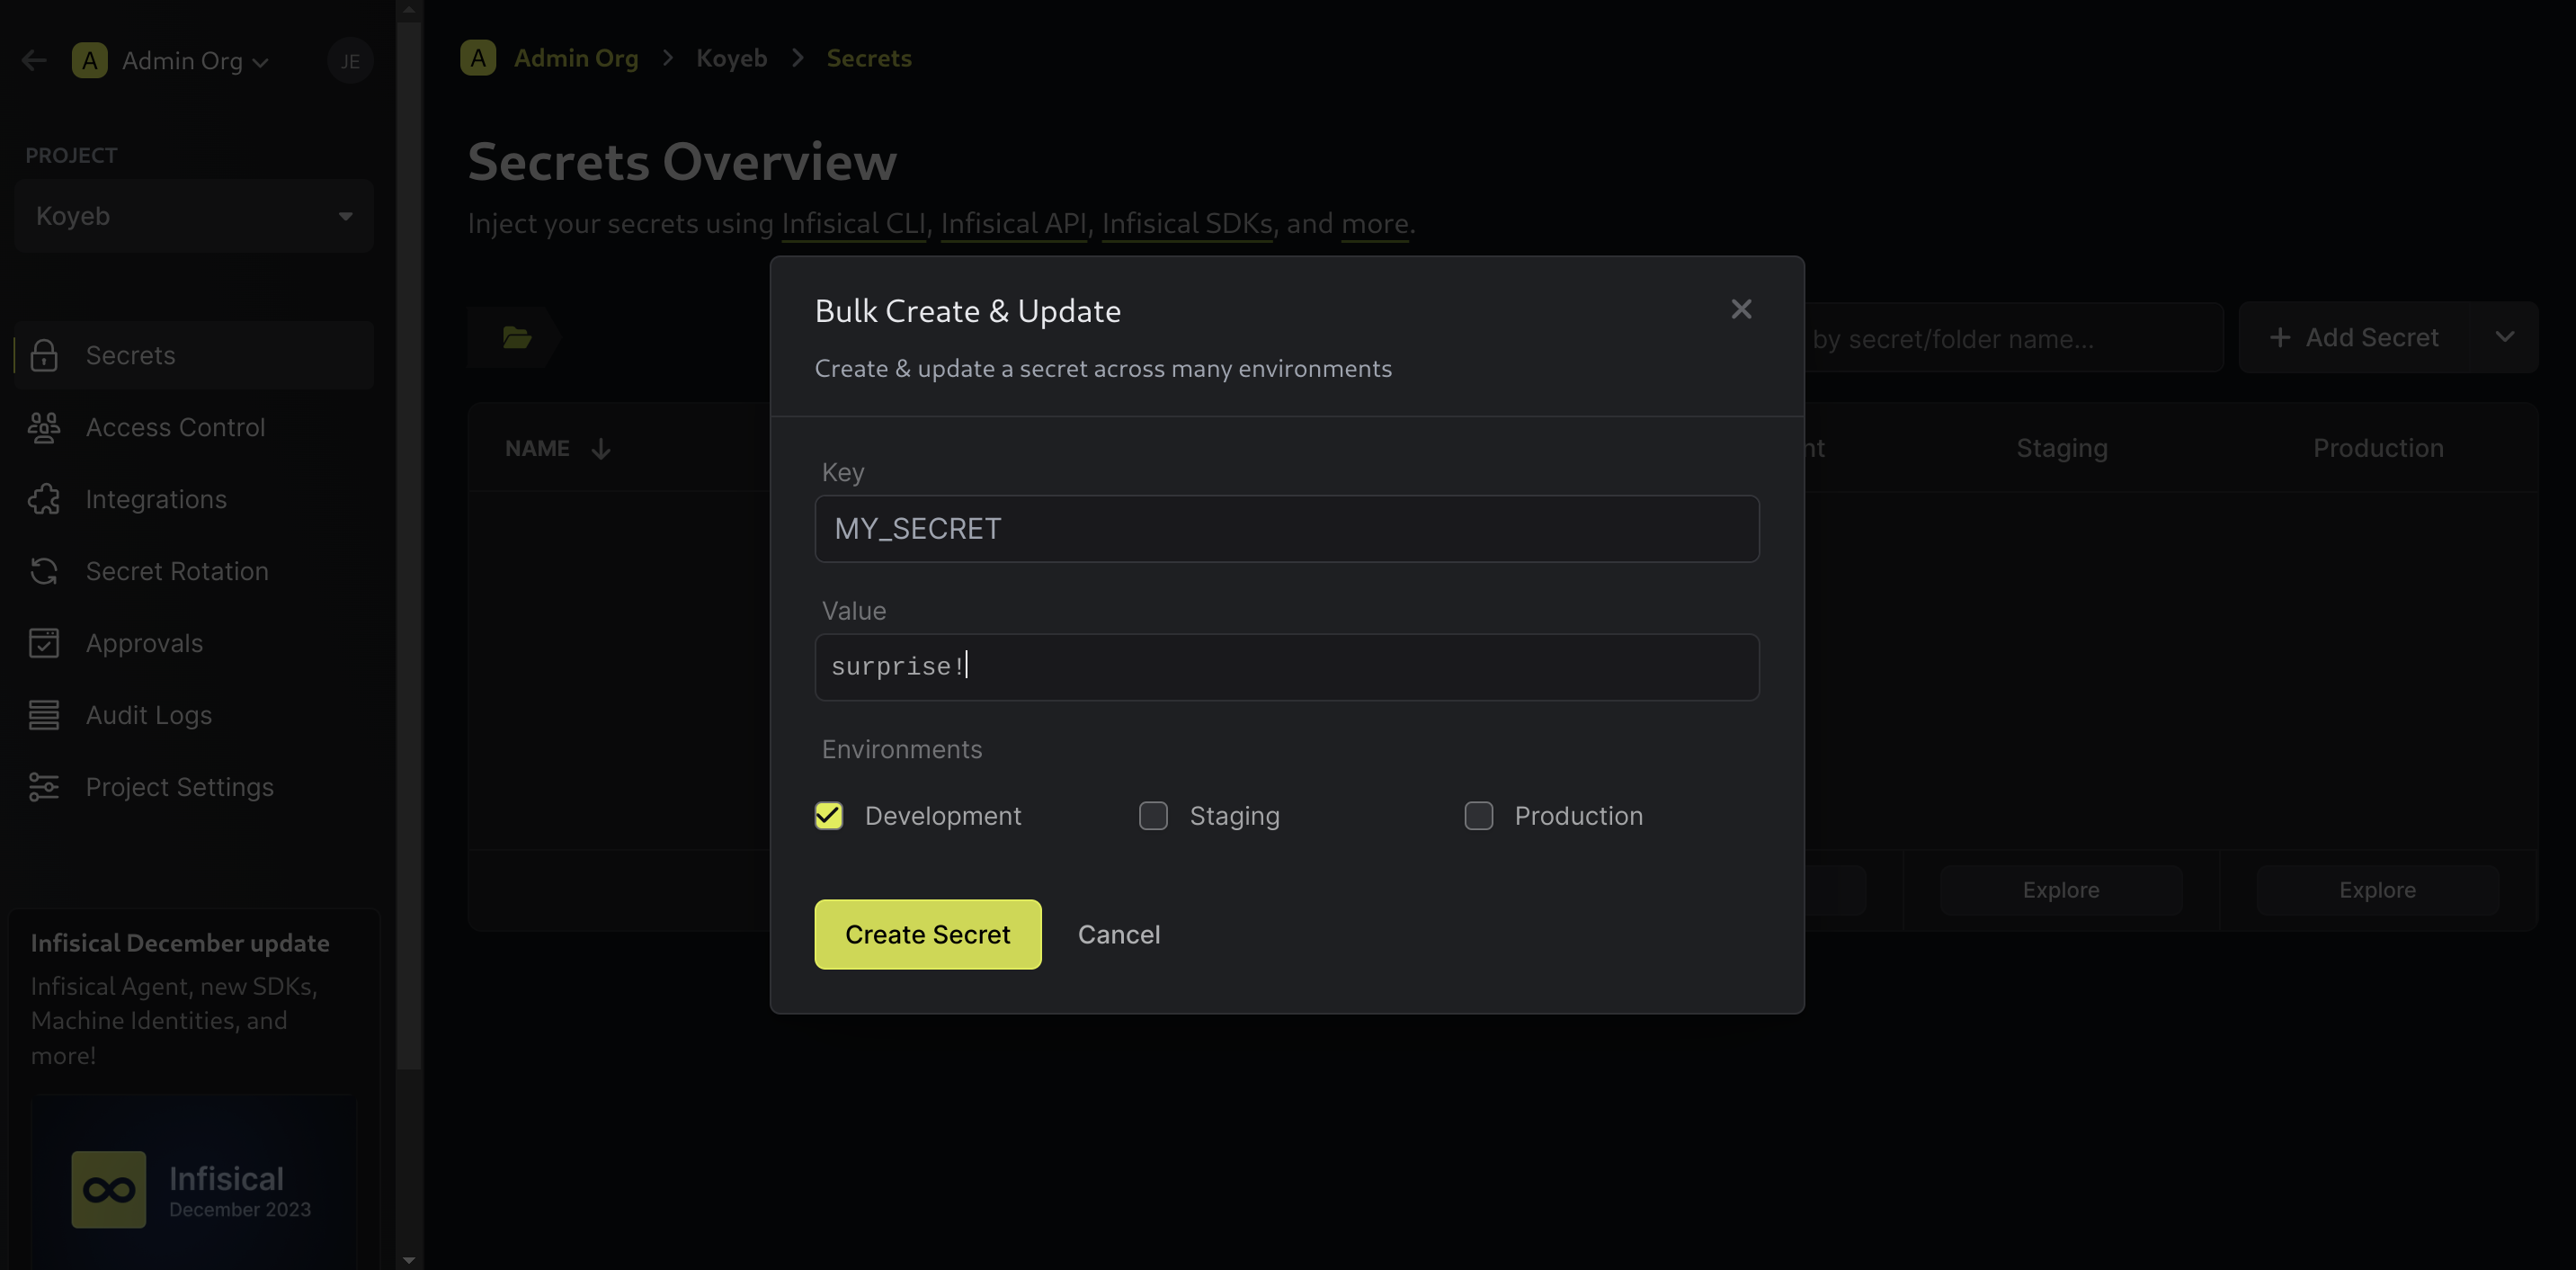
Click Create Secret when you are finished. You should see the secret you created and an indication of what environments it is accessible from:
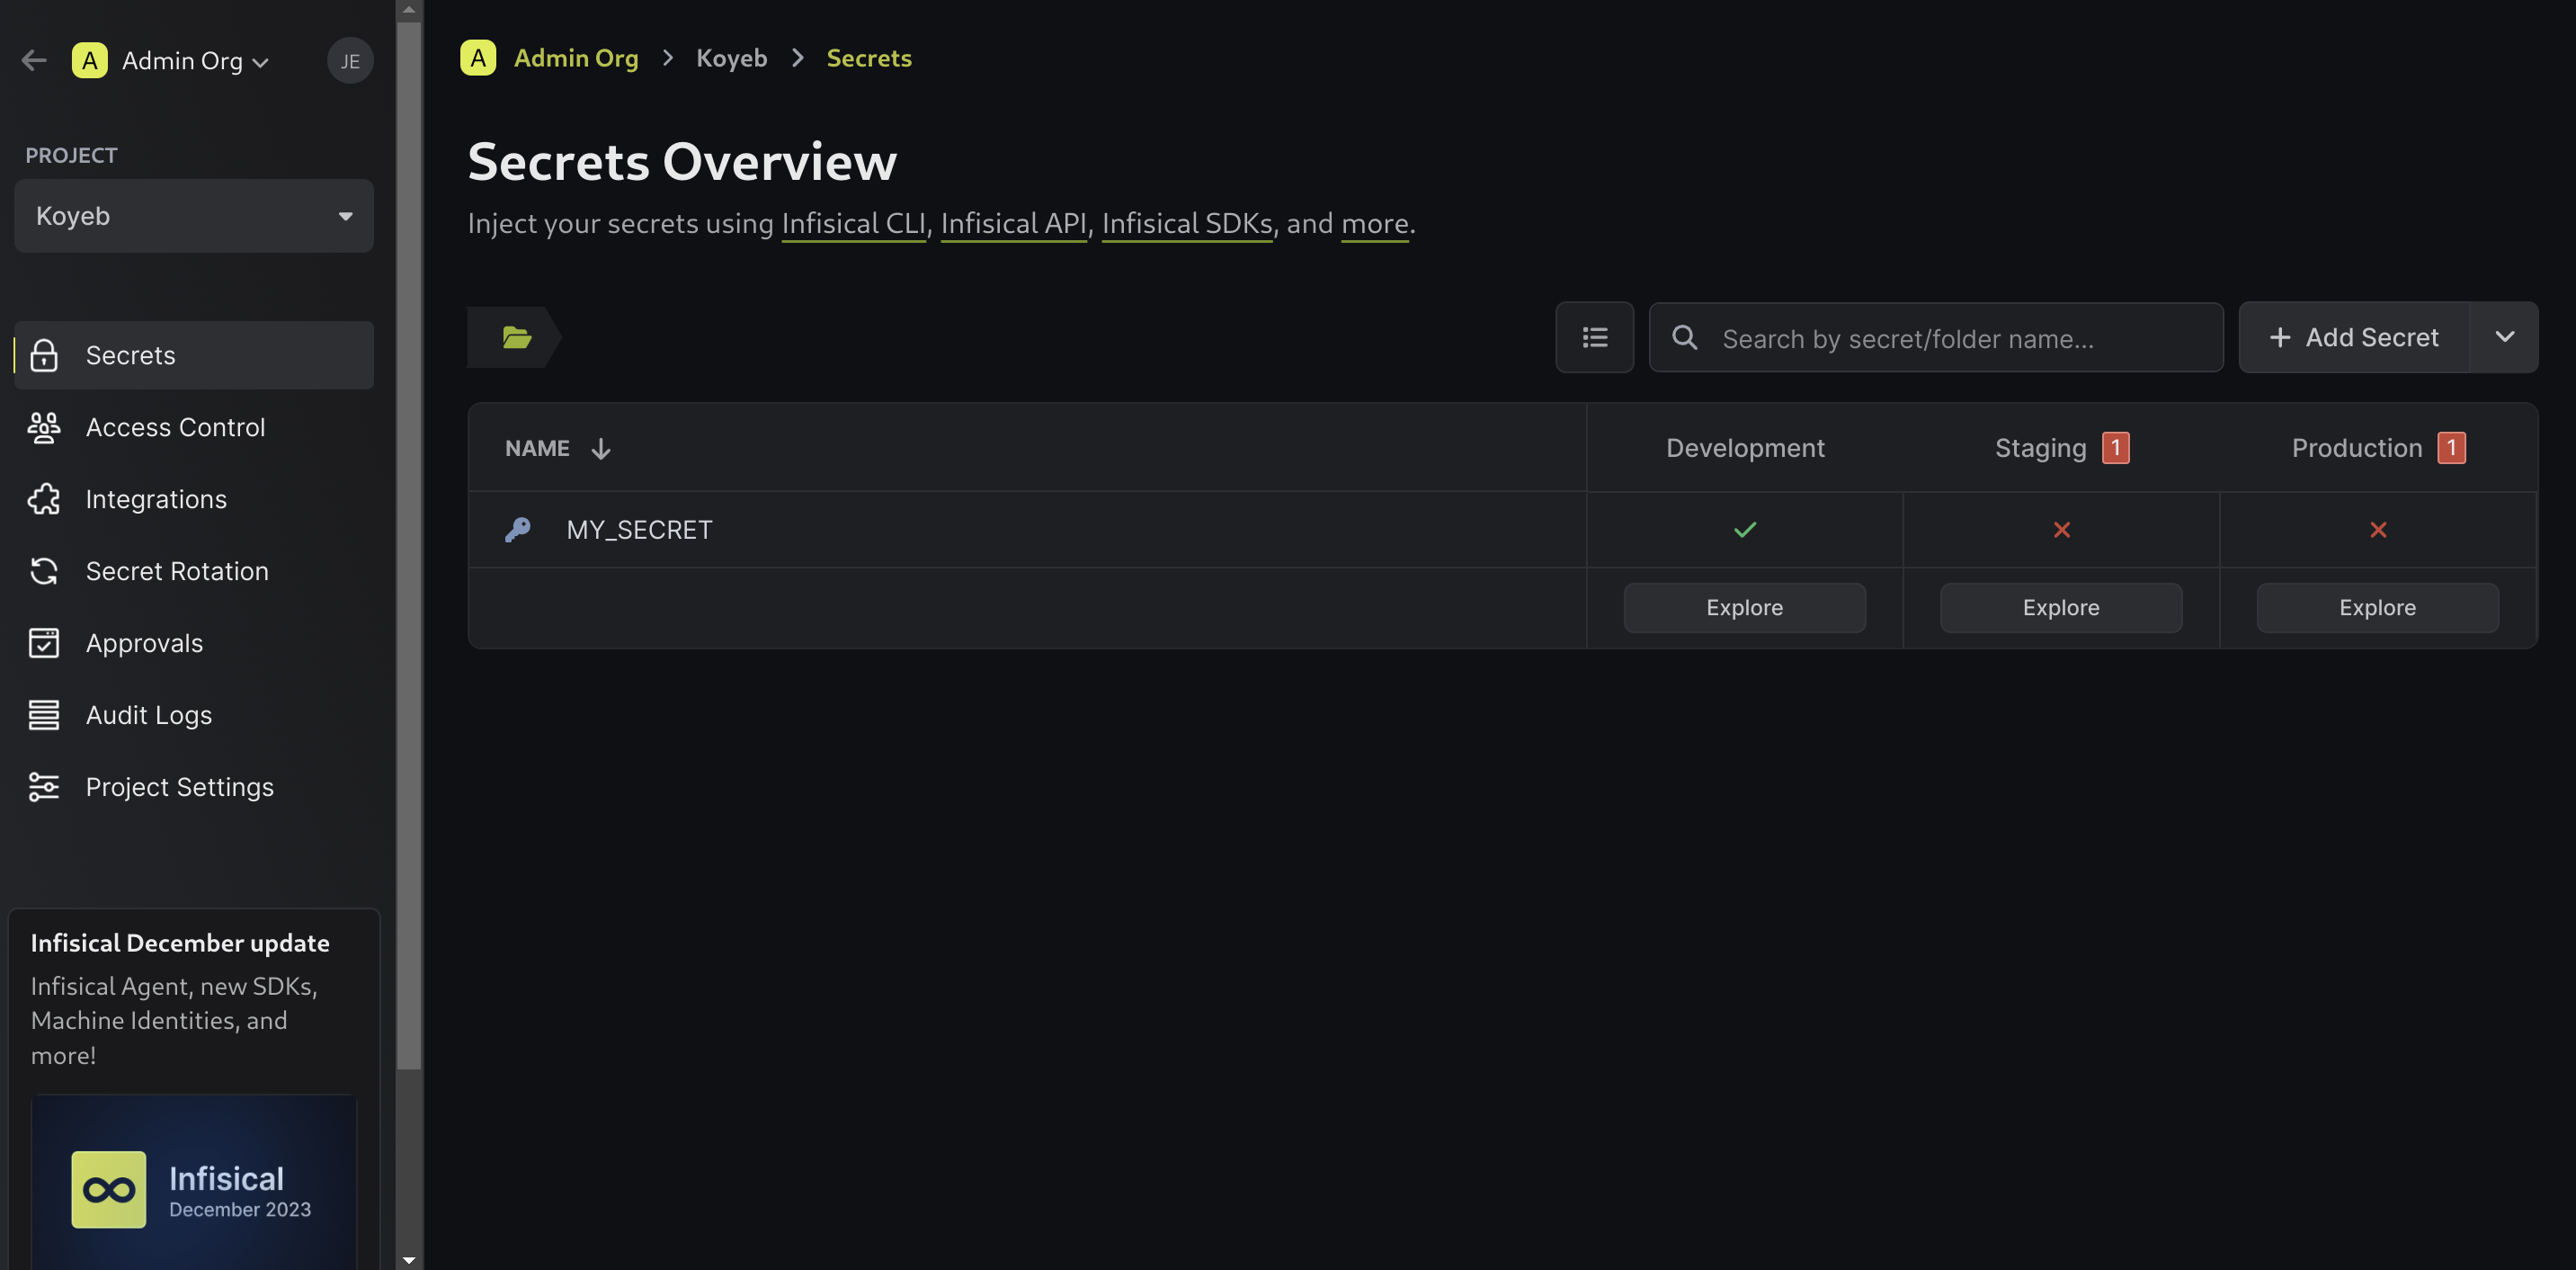
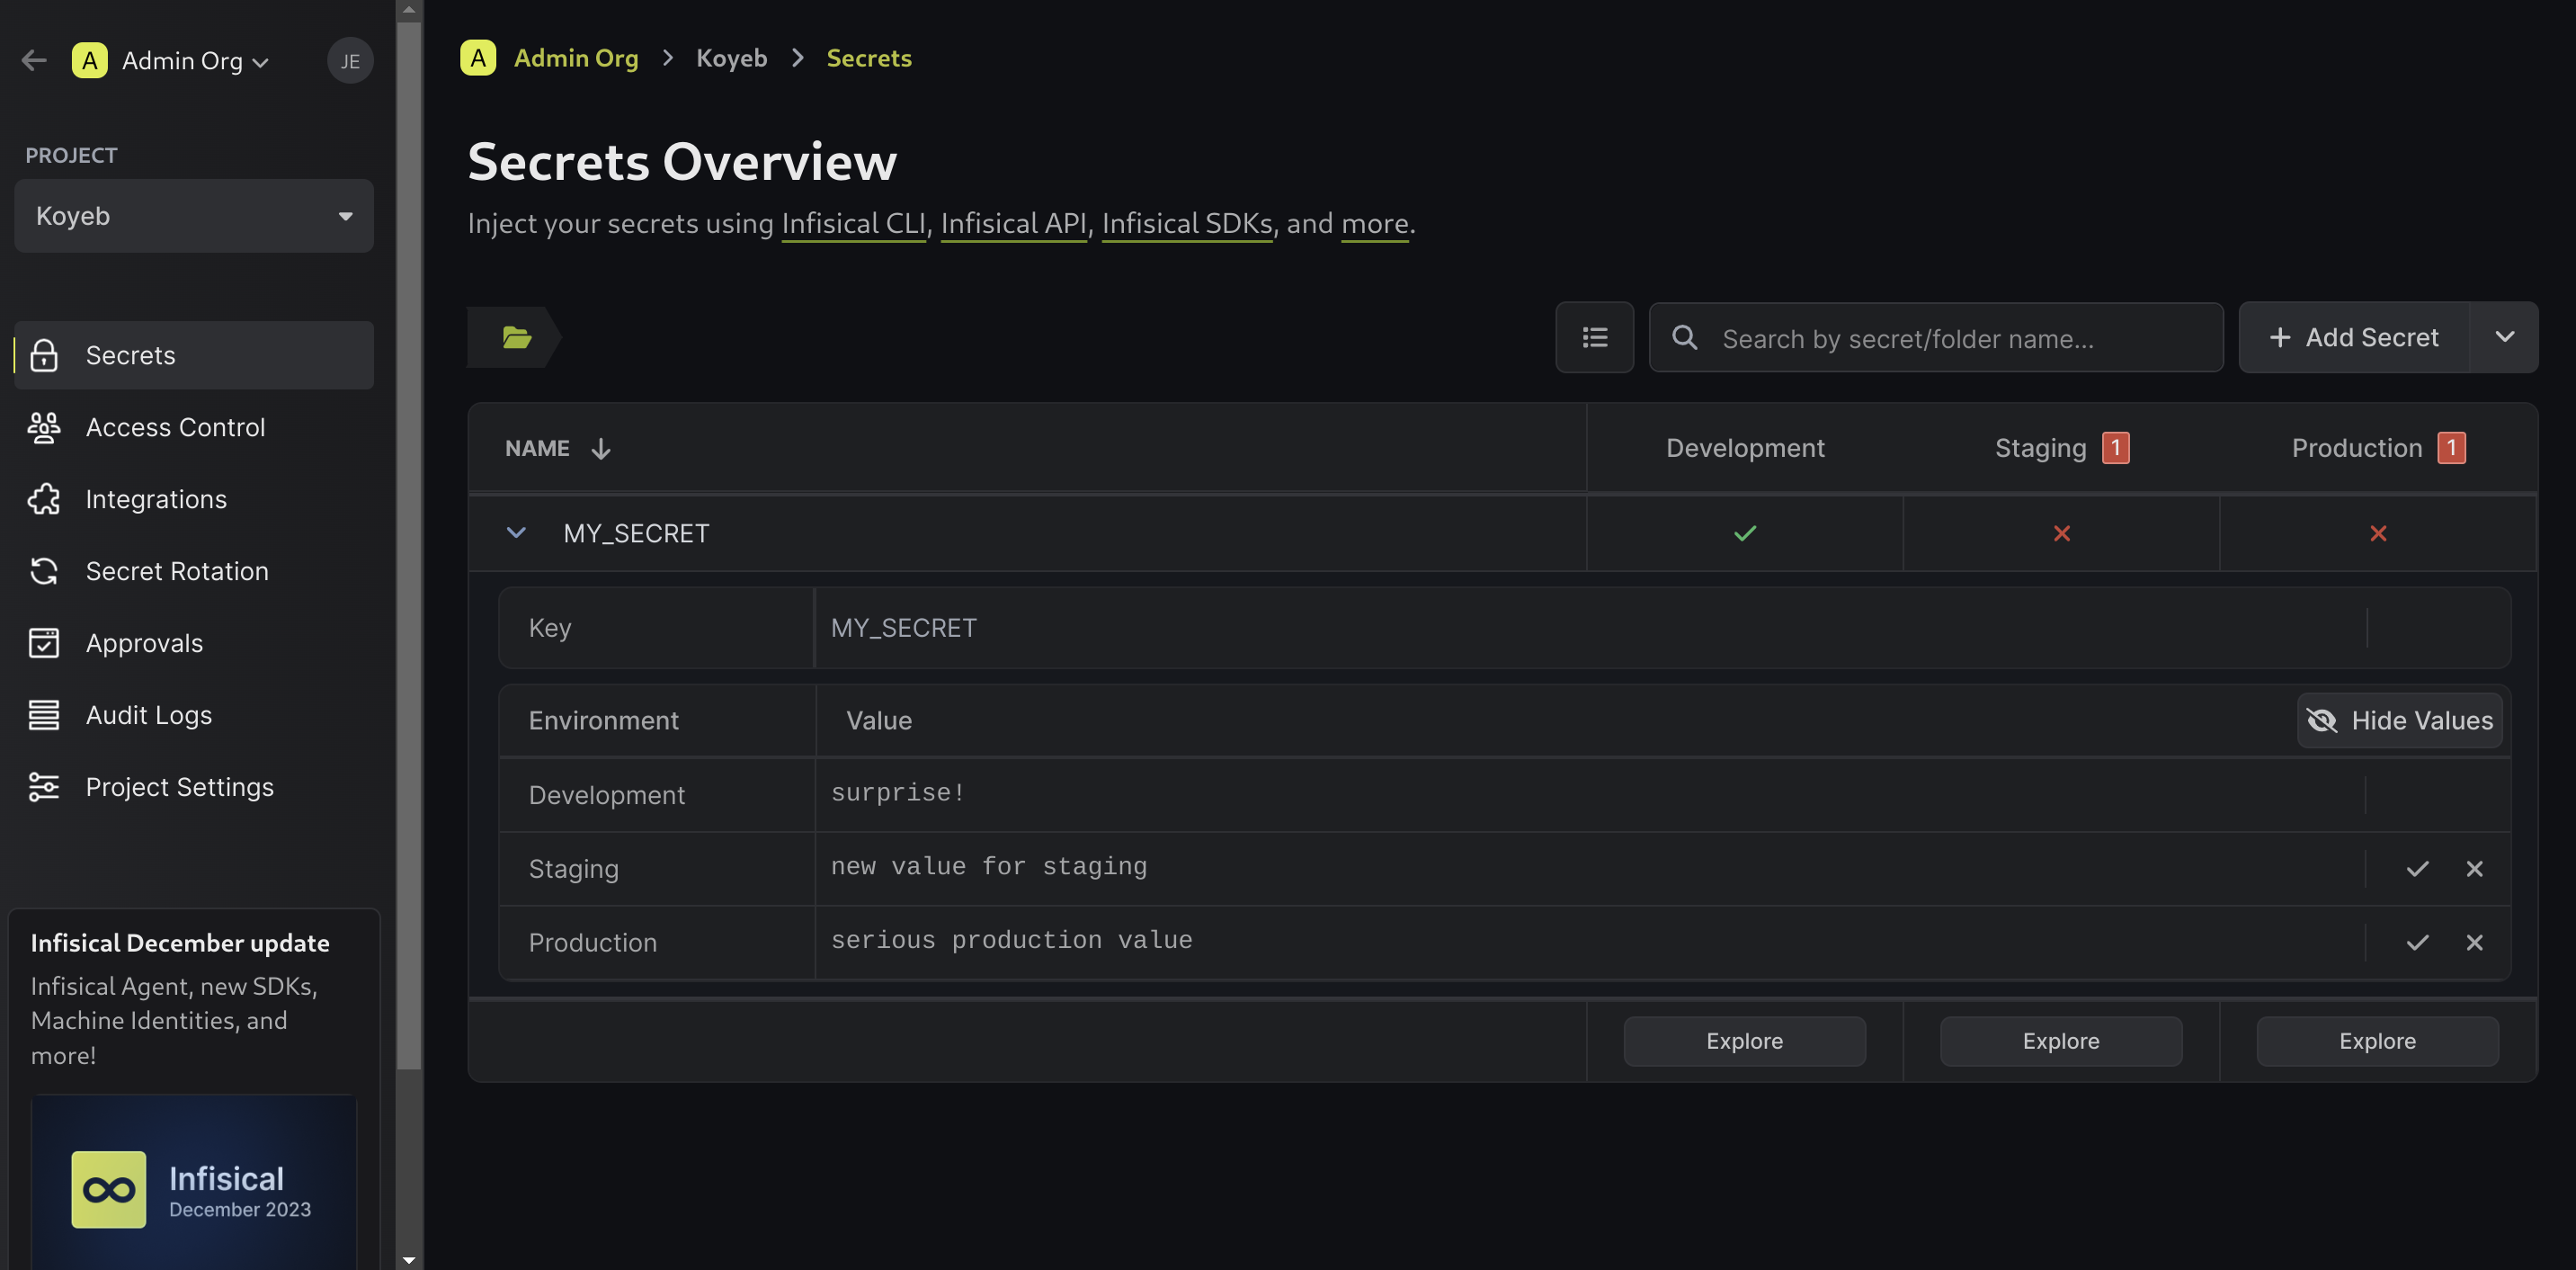
Here, we can see that our secret has only been configured for our project's development environment. To add different values to your other environments, click on the secret table row to expand it:

From here, you can add different values for your various environments. Click the Check marks associated with each environment to save the values you enter:
Access secrets for your applications
With secrets configured for your environments, you can now use Infisical to provide those values to your application environments during deployment. Infisical offers many integrations that you can use to inject secrets into your applications.
As a simple demonstration, we'll use the Infisical CLI to retrieve secrets for various environments and make them available to applications. Install the CLI according to the instructions available for your platform.
When you are ready, authenticate to your Infisical instance by typing:
infisical login
When prompted, select Self Hosting. Paste the public domain of your Infisical instance when prompted. Infisical will open a browser tab and, assuming you are already logged in, prompt you to choose your organization to confirm the authentication.
Next, navigate to your project's directory. If you don't have a project and simply want to test the CLI, you can navigate to the /tmp directory. Initialize Infisical in the project directory by typing:
infisical init
Select the Infisical organization that your project is a part of when prompted (this will be "Admin Org" unless you changed it). Afterwards, select the project you created ("Koyeb" in our example).
The Infisical CLI created an .infisical.json file in the current directory with information about the Infisical project that should be used in this context. Now, we can retrieve secrets by typing:
infisical secrets
The output will show you the secrets and values declared for the development environment by default:
┌─────────────┬──────────────┬─────────────┐
│ SECRET NAME │ SECRET VALUE │ SECRET TYPE │
├─────────────┼──────────────┼─────────────┤
│ MY_SECRET   │ surprise!    │ shared      │
└─────────────┴──────────────┴─────────────┘
You can get the values for other environments by passing the --env flag with prod or staging:
infisical secrets --dev prod
The output will reflect the appropriate value for the specified environment:
┌─────────────┬──────────────────────────┬─────────────┐
│ SECRET NAME │ SECRET VALUE             │ SECRET TYPE │
├─────────────┼──────────────────────────┼─────────────┤
│ MY_SECRET   │ serious production value │ shared      │
└─────────────┴──────────────────────────┴─────────────┘
To format the secrets for your applications, use the export command instead:
infisical export
By default, it formats the secrets using the .env file format:
MY_SECRET='surprise!'
You can choose an alternative format by passing the --format flag with dotenv (the default), json, or csv:
infisical export --format json
When piped to jq, the output would now include a JSON object with some additional metadata:
[
  {
    "key": "MY_SECRET",
    "workspace": "",
    "value": "surprise!",
    "type": "shared",
    "_id": "d1c53fcd-f724-478b-a80e-80c1f72ebe10",
    "tags": [],
    "comment": ""
  }
]
You can again pass the --env flag to get values for other environments.
To run an application with your environment, you can use the infisical run command. To demonstrate, create a simple shell script called test.sh in your current directory. Inside, enter the following:
#!/usr/bin/env bash

echo "My secret value is: ${MY_SECRET}"
Make the script executable and the Infisical command line can run your script directly with:
chmod +x test.sh
infisical run --env=prod -- ./test.sh
You should see the results as expected:
My secret value is: serious production value
Run your services on the best serverless platform and enjoy the built-in CI/CD pipeline, global load balancing, real-time metrics and monitoring, autoscaling, and more.
Conclusion
In this guide, we showed how to set up an Infisical instance in production to manage your secret and configuration data for applications and users. We provisioned a PostgreSQL database to store application data and a Redis instance to handle sessions. We also set up SMTP email so that Infisical can send emails for various user account flows.
While we primarily demonstrated how to work with Infisical using their provided command line client, their vast collection of integrations allows for easier access in many cases. As you incorporate Infisical into your environment, take a look at the available providers to learn how to connect seamlessly with your applications.

