Use pgvector and Hugging Face to Build an Optimized FAQ Search with Sentence Similarity
For Artificial Intelligence (AI)/ Machine Learning (ML) models to perform their tasks effectively, the data at hand, including videos, images, and texts, must be presented in a format that they can comprehend and use. Vector embeddings play a crucial role in this process by transforming complex data into numerical representations that AI/ML models can process effectively, enabling them to extract meaningful insights and make predictions based on the provided data.
Hugging Face provides an Inference API offering diverse models for a range of tasks, including sentence similarity tasks. In this tutorial, you will use Hugging Face's Inference API alongside pgvector, an open-source vector similarity search extension for PostgreSQL, to create and deploy a simple FAQ search system on Koyeb that leverages text similarity searching.
You can deploy the FAQ search as configured in this guide using the Deploy to Koyeb button below:

Note: You will need to replace the values of the environment variables in the configuration with your own HF_TOKEN and DB_URL. Remember to add the ?ssl=true parameter to the DB_URL value.
Requirements
To successfully follow this tutorial, you will need the following:
- Node.js and npm installed. The demo app in this tutorial uses version 18 of Node.js
- Git installed
- A Hugging Face account
- A Koyeb account to deploy the application
Steps
To complete this guide and deploy the FAQ text similarity search application, you'll need to follow these steps:
- Generate Hugging Face Token
- Create Postgres Database with Koyeb
- Start the text similarity search project
- Set up the database connection
- Add seed data to the database
- Set up the Express server to respond with related FAQ questions
- Set up the home page view for submitting search terms
- Add the search functionality
- Deploy to Koyeb
Generate Hugging Face Token
HTTP requests to the Hugging Face API require an authorization token. To generate this token, while logged into your Hugging Face account, navigate to the access tokens page and click the "New token" button. Enter a name for your token, and then click the "Generate a token" button to generate it. Copy and securely store this token for later use.
Create Postgres Database with Koyeb
To initiate the creation of a Postgres database, access your Koyeb control panel and navigate to the Databases tab. Next, click on the Create Database Service button. Here, you can either provide a custom name for your database or stick with the default one, choose your preferred region, specify a default role, or keep the default value, and finally, click the Create Database Service button to establish your Postgres database service.
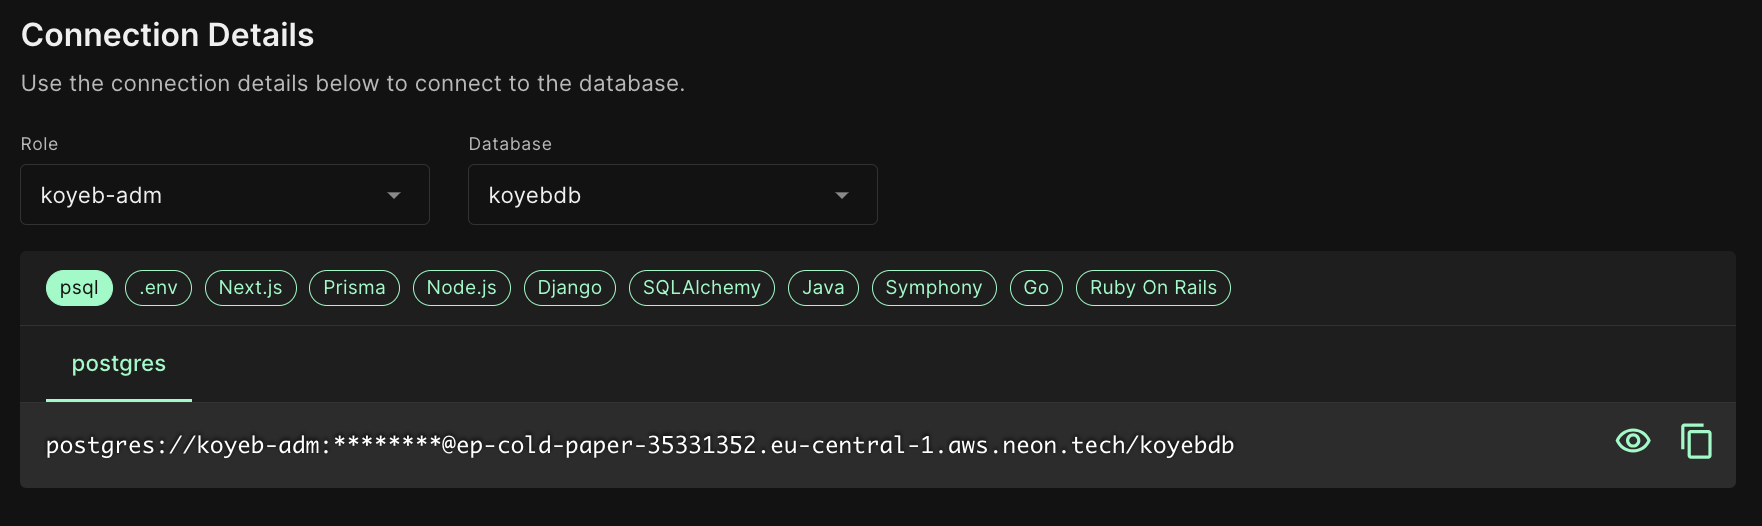
Once you've created the Postgres database service, a list of your existing database services will be displayed. From there, select the newly created database service, copy the database connection string, and securely store it for future use.
Start the text similarity search project
In this section, we'll set up an npm project with TypeScript and install the essential packages for the demo application. To begin, create a directory on your development machine to organize your code. You can do this by executing the following command in your terminal window:
mkdir -p faq_search/src
The command above creates a faq_search directory, which serves as the root directory for the application, and also a src directory within it, which will house the project code. Next, run the commands below to initialize a Git repository within the just created faq_search directory:
cd faq_search
git init
The initial command above switches your terminal's current directory to the faq_search directory, while the second command initializes a Git repository within that directory.
Next, initialize an npm project in the faq_search directory by executing the following command in your terminal window:
npm init -y
The command above establishes an npm project in the faq_search directory, creating a package.json file. Using -y skips the questionnaire and fills it with default configurations. Next, in your terminal window, run the command below to install the necessary libraries and packages for building the demo application:
npm install express ejs pg axios pgvector
npm install -D dotenv typescript nodemon ts-node @types/express @types/pg
The above command installs the packages passed to the install command, with the -D flag specifying the libraries intended for development purposes only.
The libraries installed include:
express: A web framework for Node.js.ejs: A JavaScript templating engine.pg: A PostgreSQL client for Node.js.axios: A Promise-based JavaScript HTTP client.pgvector: A vector similarity search library for Node.js
The development-specific libraries include:
dotenv: A library for handling environment variables.typescript: Enables the execution of TypeScript code.nodemon: Detects code changes to restart the application during development.ts-node: To execute and rebuild TypeScript efficiently.@types/express: Type definitions for express.@types/pg: Type definitions for pg.
With the required libraries now installed, create a tsconfig.json file in the root directory of your project and add the following code to it:
{
  "compilerOptions": {
    "target": "es2016",
    "module": "commonjs",
    "esModuleInterop": true,
    "forceConsistentCasingInFileNames": true,
    "strict": true,
    "skipLibCheck": true
  },
  "include": ["src/**/*.ts"],
  "exclude": ["node_modules"]
}
The tsconfig.json file serves as a configuration file for TypeScript, outlining the parameters for transpiling TypeScript code within a project.
With this last code change, the project set-up is complete. In the following section, you will establish a connection to the Postgres database created in the preceding steps.
Set up the database connection
The node-postgres(pg) library provides a low-level interface to interact directly with PostgreSQL databases using raw SQL queries.
To initiate the setup of a database connection, generate a .env file in the root directory of your project and include the following code, replacing the placeholder values with your own:
HF_TOKEN="<YOUR_HUGGING_FACE_TOKEN>"
DB_URL="<YOUR_DATABASE_CONNECTION_URL>?ssl=true"
The addition of the ssl=true parameter to the DB_URL value above indicates that the database connection should be established with SSL enabled.
The values added to the .env file should be kept secret and not included in Git history. To ensure this, create a .gitignore file by running the command below:
printf "%s\n" ".env" "node_modules" "src/**/*.js" > .gitignore
The command above creates a .gitignore file and includes the .env file, the node_modules directory, and all TypeScript-generated JavaScript files into it, ensuring they're excluded from the Git history.
Create the database client
Following that, establish a database client to connect to the database. To achieve this, generate a db directory in the src directory. Inside this db directory, create a db.ts file and insert the following code:
import 'dotenv/config'
import { Pool } from 'pg'

const connectionString: string = `${process.env.DB_URL}`
const pool = new Pool({ connectionString })

export default pool
The provided code begins by importing the dotenv configuration, followed by importing the Pool class from the pg library. It then retrieves the database URL from the environment variables and uses it to create a new pool instance, which is subsequently exported.
Create the database schema
Next, create a schema.ts file within the db directory and add the following code to it:
import pool from './db'

// create vector extension if it doesn't exist
pool
  .query('CREATE EXTENSION IF NOT EXISTS vector;')
  .then(() => {
    // Create the "documents" table if it doesn't exist
    return pool.query(
      'CREATE TABLE IF NOT EXISTS documents (id SERIAL PRIMARY KEY, title text, embedding vector(384));'
    )
  })
  .then(() => {
    console.log('Database setup complete.')
  })
  .catch((error) => {
    console.error('Error setting up the database:', error)
  })
The code above defines how data will be stored, organized and managed in the database. Using the pool database instance, it executes an SQL query to create the vector extension within the database if it does not already exist.
The vector extension enables Postgres databases to store vector embeddings. After creating the vector extension, a subsequent SQL query creates a documents table within the database. This table comprises three columns:
- An
idcolumn for storing auto-incrementing unique identifiers for each row in the table. - A
titlecolumn with atextdata type for storing text data. - An
embeddingcolumn with avector(384)data type. This column will store vector data with a length of 384 elements.
After executing the SQL queries, a message is printed to the console to confirm success or show an error message.
To execute the code added to the schema file, update the script section of your package.json file with the following code:
...
"scripts": {
  "test": "echo \"Error: no test specified\" && exit 1",
  "db:setup": "ts-node src/db/schema"
},
...
The included db:setup script runs the code within the schema.ts file when executed.
Test the database setup locally
To execute it, run the following command in your terminal window:
npm run db:setup
If the command is executed successfully, you will see a message in your terminal window stating, Database setup complete., marking the completion of the database connection setup. The next section will center on adding some sample data to the database.
Add seed data to the database
The FAQ search application will operate by retrieving questions from the database with titles that closely match the submitted search term. In this section, we will insert 100 fictitious travel-related FAQ questions into the database.
Hugging Face provides the SentenceTransformers framework, featuring pre-trained models designed for generating embeddings from sentences, text, and images. Among these models is the all-MiniLM-L6-v2, which will be used to generate embeddings for the seed data to be added to the database.
To get started, create a helpers.ts file in the src directory and include the following code within the file:
import axios, { AxiosError } from 'axios'
import 'dotenv/config'
import pgvector from 'pgvector/pg'

import pool from './db/db'

const modelId: string = 'sentence-transformers/all-MiniLM-L6-v2'
const API_URL: string = `https://api-inference.huggingface.co/pipeline/feature-extraction/${modelId}`

// function to save embeddings to the db
export const saveEmbedding = async (title: string, embedding: string): Promise<void> => {
  const query = {
    text: 'INSERT INTO documents (title, embedding) VALUES ($1, $2)',
    values: [title, embedding],
  }

  try {
    await pool.query(query)
  } catch (error) {
    throw error
  }
}

// function to find similar embeddings in the database
export const findSimilarEmbeddings = async (embedding: string): Promise<any[]> => {
  try {
    // find nearest neighbour by L2 distance
    const res = await pool.query(
      'SELECT title, embedding <-> $1 AS distance FROM documents ORDER BY distance LIMIT 5',
      [embedding]
    )

    return res.rows
  } catch (error) {
    throw error
  }
}

// API request to generate embedding for a text
export const generateEmbedding = async (text: string): Promise<string> => {
  try {
    const response = await axios.post(
      API_URL,
      {
        inputs: text,
        options: { wait_for_model: true },
        // If the model is not ready, wait for it instead of receiving 503
      },
      {
        headers: { Authorization: `Bearer ${process.env.HF_TOKEN}` },
      }
    )

    return pgvector.toSql(response.data)
  } catch (error) {
    const err = error as AxiosError
    throw err.message
  }
}
The code starts by importing various libraries:
dotenvfor managing environment variablesaxiosand theAxiosErrortype for HTTP requestspgvectorfor handling vector embeddingspooldatabase instance for connecting to the database
Following that, the ID for the all-MiniLM-L6-v2 model is assigned to a variable named modelId, and this variable is used to specify the API URL for generating vector embeddings with the model.
The code further defines and exports three functions: saveEmbedding, findSimilarEmbeddings, and generateEmbedding.
- The
saveEmbeddingfunction executes an SQL query to insert a text and its corresponding vector embedding into thedocumentstable. - Conversely, the
findSimilarEmbeddingsfunction, when provided with a vector embedding, executes an SQL query to retrieve the top 5 most similar vector embeddings from the database along with their corresponding titles. - Lastly, the
generateEmbeddingfunction receives a text input and initiates a POST HTTP request to the Hugging Face API, including the Hugging Face authorization token in the request header. The vector embedding obtained from the API's response for the given text is then transformed into an SQL vector using thetoSqlmethod frompgvectorand subsequently returned.
To generate seed data for the database, create a seed.ts file in the db directory. Add the code below to the file:
import { generateEmbedding, saveEmbedding } from '../helpers'

const travelFAQ = [
  'How do I book a flight?',
  'What types of accommodations do you offer?',
  'Can I customize my travel package?',
  'What is the cancellation policy?',
  'Do you offer travel insurance?',
  'Are there any travel restrictions due to COVID-19?',
  'What travel documents do I need?',
  'How do I make a payment?',
  'Can I change my travel dates?',
  'What are the popular destinations you offer?',
  'Do you provide airport transfers?',
  'How can I contact customer support?',
  'What is the baggage allowance for my flight?',
  'Can I request special dietary options for meals?',
  'What is the check-in process at hotels?',
  'Do you offer group travel discounts?',
  'What activities and tours are available at my destination?',
  'Is there a loyalty program for frequent travelers?',
  'What is the best time to visit specific destinations?',
  'Can I add additional travelers to my booking?',
  'What is your privacy policy?',
  'Do you have a mobile app for booking?',
  'What is the process for booking a cruise?',
  'Are there any hidden fees in the travel packages?',
  'Can I book a one-way flight?',
  'How do I check the status of my booking?',
  'Do you provide travel itineraries?',
  'What is the child policy for accommodations?',
  "Can I make changes to my booking after it's confirmed?",
  'What are the payment options you accept?',
  'Are flights refundable?',
  'What is the difference between economy and business class?',
  'Can I book a trip for a large group?',
  'How do I get a visa for international travel?',
  "What is your travel agency's history?",
  'Do you offer last-minute travel deals?',
  'Can I book a round-trip flight with different airlines?',
  'What is the process for rescheduling a flight?',
  'Do you offer travel packages for honeymoons?',
  'How can I get travel tips for my destination?',
  'What is the process for booking a vacation package?',
  'Can I book a trip for someone else?',
  'What is the procedure for lost luggage?',
  'Do you provide transportation from the airport to accommodations?',
  'What is the policy for children traveling alone?',
  'Can I book a multi-city itinerary?',
  'How do I check in for my flight online?',
  "What is the travel agency's customer satisfaction rate?",
  'Can I book a trip for a special occasion?',
  'What is the refund policy for canceled flights?',
  'Do you offer guided tours?',
  'How can I get travel insurance information?',
  'What is the difference between a direct and non-stop flight?',
  'What are the best times to visit popular destinations?',
  'Can I choose my seat on the flight?',
  'How do I request special assistance for my travel?',
  'What is the process for booking a group vacation?',
  'Do you offer gift certificates for travel?',
  'How do I use travel rewards or miles for bookings?',
  "What is the travel agency's pricing policy?",
  'Can I request specific room preferences in accommodations?',
  'What is the minimum age for travelers?',
  'How do I apply for a passport?',
  'Do you offer travel packages for sporting events?',
  'Can I book a trip for a family reunion?',
  'What is your policy for lost or stolen documents?',
  'How do I check the weather at my destination?',
  'What is the procedure for missed connections?',
  'Do you provide travel safety tips?',
  'Can I book a trip for a school group?',
  'What is your loyalty program for frequent travelers?',
  'How do I check flight availability for a specific date?',
  'What is your policy for travelers with disabilities?',
  'Do you have a best price guarantee for bookings?',
  'Can I book a one-way flight with a return date open?',
  'What is the process for booking an all-inclusive vacation?',
  'Are there any discounts for senior citizens?',
  'How can I request a travel brochure?',
  'What is the procedure for damaged baggage?',
  'Do you offer travel package deals for special occasions?',
  'How do I find out about travel advisories?',
  'What is the process for booking a honeymoon package?',
  'Can I book a trip for a solo traveler?',
  'What is your policy for delayed or canceled flights?',
  'How do I track my checked baggage?',
  "What is the travel agency's social media presence?",
  'Do you provide travel advice for first-time travelers?',
  'Can I book a trip for a corporate event?',
  'What is your policy for missed flights?',
  'How can I subscribe to your travel newsletter?',
  'What is the process for booking a romantic getaway?',
  'Are there any deals for military personnel?',
  'Can I book a trip for a religious pilgrimage?',
  'What is your policy for travel during peak seasons?',
  'How do I make special requests for my accommodations?',
  "What is the travel agency's rating and reviews?",
  'Do you offer recommendations for dining at destinations?',
  'How can I inquire about local culture at my destination?',
  'What is the process for booking a wellness retreat?',
  'Can I book a trip for adventure travel?',
  'What is your policy for trip insurance claims?',
  'How do I get information on local transportation at my destination?',
  'What is your policy for weather-related flight delays?',
  'Do you provide recommendations for travel photography?',
  'How can I access travel resources for my destination?',
  'What is the process for booking a safari tour?',
  'Can I book a trip for wildlife and nature exploration?',
  'What is your policy for natural disasters at destinations?',
  'How do I check for any travel alerts or warnings?',
  'Do you offer recommendations for cultural events at destinations?',
  'What is your policy for travel disruptions due to strikes or protests?',
  'What is the process for booking a beach vacation?',
  'Can I book a trip for water sports and activities?',
  'How do I report an issue with accommodations?',
  'What is your policy for medical emergencies during travel?',
  'Do you provide recommendations for local entertainment at destinations?',
  'How can I inquire about local shopping opportunities at my destination?',
  'What is the process for booking a winter sports trip?',
  'Can I book a trip for educational travel and study programs?',
  'What is your policy for safety concerns at destinations?',
  'How do I get information on local customs and etiquette at my destination?',
]

travelFAQ.forEach(async (question) => {
  try {
    const embedding = await generateEmbedding(question)
    saveEmbedding(question, embedding)
  } catch (error) {
    console.error(error)
  }
})
The code added to the seed.ts file imports the generateEmbedding and saveEmbedding helper functions and defines a travelFAQ array, which contains 100 travel-related questions.
For each question in the travelFAQ array, a vector embedding is generated using the generateEmbedding function and then saved to the database using the saveEmbedding function. Errors that occur while creating and saving a vector embedding are logged on the console.
To execute the code in the seeds file, update the scripts section of your package.json file with the code below:
"scripts": {
  "test": "echo \"Error: no test specified\" && exit 1",
  "db:setup": "ts-node src/db/schema",
  "db:seed": "ts-node src/db/seed",
},
Test the database locally
The db:seed script added above executes the seed.ts file. To run the script, run the code below in your terminal window:
npm run db:seed
Successfully running the command above should display no error message in your terminal window.
In this section, 100 travel-related questions and their corresponding vector embeddings have been added to the database. The next section will focus on setting up an Express server to use this data.
Set up the Express server to respond with related FAQ questions
An HTTP server is required to accept user input and respond to it with related FAQ questions. To set up an Express server, create an index.ts file in the src directory and add the following code to it:
import bodyParser from 'body-parser'
import 'dotenv/config'
import express, { Express, Request, Response } from 'express'
import path from 'path'

const app: Express = express()
const port = process.env.PORT || 4000

app.use(bodyParser.urlencoded({ extended: false }))
app.set('view engine', 'ejs')
app.set('views', path.join(__dirname, 'views'))

// display root page
app.get('/', (req: Request, res: Response) => {
  res.render('index')
})

app.listen(port, () => {
  console.log(`🔥🔥🔥: Server is running at http://localhost:${port}`)
})
The code above imports the following libraries:
- The
dotenv/configfor accessing environment variables. expressalong with types forExpress,Request, andResponseobjects for setting up a web server.- The
body-parsermiddleware, used for parsing request body data. - The
pathmodule, which manages file paths.
The code proceeds to create an Express app instance and sets the server's port to the value of the PORT environment variable or defaults to 4000 if not specified. Additionally, it configures the Express server to use body-parser for handling URL-encoded data from incoming requests, and it sets the server's view engine to EJS with the views directory pointing to a folder named views.
Furthermore, the code defines a route for handling HTTP requests to the root route (/) and renders the index view upon matching the root route. Finally, the server is initiated, listens for requests on the specified port, and logs a message to confirm it is running.
The Express server setup is now complete. The following section will focus on setting up the view page for submitting search terms.
Set up the home page view for submitting search terms
The demo app needs a page to receive search terms and pass them to the Express server for processing. To set that up, start with creating a views folder within the src directory. Within this newly created views folder, create an index.ejs file and insert the following code into it:
<!doctype html>
<html lang="en">
  <head>
    <meta charset="UTF-8" />
    <meta name="viewport" content="width=device-width, initial-scale=1.0" />
    <title>FAQ PAge</title>

    <style>
      body {
        font-family: Arial, sans-serif;
        background-color: #f2f2f2;
        margin: 0;
        padding: 0;
      }

      .faq-container {
        max-width: 800px;
        margin: 0 auto;
        background-color: #fff;
        border-radius: 8px;
        padding: 20px;
        box-shadow: 0 0 10px rgba(0, 0, 0, 0.2);
      }

      h1 {
        text-align: center;
        color: #333;
      }

      .search-box {
        text-align: center;
        margin: 20px 0;
      }

      input[type='text'] {
        width: 60%;
        padding: 10px;
        border: 1px solid #ccc;
        border-radius: 4px;
        font-size: 16px;
      }

      button {
        padding: 10px 20px;
        background-color: #007bff;
        color: #fff;
        border: none;
        border-radius: 4px;
        font-size: 16px;
        cursor: pointer;
      }

      button:hover {
        background-color: #0056b3;
      }

      .results {
        list-style-type: none;
        padding: 0;
      }

      .results li {
        padding: 10px;
        border: 1px solid #ccc;
        border-radius: 4px;
        margin: 10px 0;
        background-color: #fff;
      }

      .results li:hover {
        background-color: #f0f0f0;
        cursor: pointer;
      }
    </style>
  </head>

  <body>
    <div class="faq-container">
      <h1>Frequently Asked Questions</h1>
      <div class="search-box">
        <form action="/search" method="POST">
          <input type="text" id="search-input" name="question" placeholder="Search FAQ..." />
          <button id="search-button" type="submit">Search</button>
        </form>
      </div>
      <% if(typeof faqs !=='undefined' ) {%>
      <ul class="results" id="results-list">
        <%faqs.forEach((faq)=> {%>
        <li><%= faq.title %></li>
        <%})%>
      </ul>
      <%}%>
    </div>
  </body>
</html>
The code within the index.ejs file specifies the HTML structure for the index view rendered by the root route handler. It includes CSS styles for:
- page formatting
- an HTML form featuring an input field for entering search terms
- a submit button for submitting the request.
Additionally, if there are any FAQ results, the titles of each FAQ item are presented in a list.
To view the index view page, modify the scripts section within your package.json file to incorporate the command for launching the application:
  "scripts": {
    "test": "echo \"Error: no test specified\" && exit 1",
    "db:setup": "ts-node src/db/schema",
    "db:seed": "ts-node src/db/seed",
    "dev": "nodemon --watch './**/*.ts' --exec ts-node ./src/index.ts"
  },
The dev script added above serves the index.ts file using nodemon and ts-node and automatically restarts the application whenever a file change is detected.
Test the UI locally
To execute the script, run the command below in your terminal window:
npm run dev
Executing the command above will present a message indicating that the server is up and running, along with the specific port it's using. To access the page, simply open your web browser and enter http://localhost:<YOUR_PORT>, where you'll find the search form displayed on the web page.
The next section will focus on implementing the capability to search for FAQ questions based on a given search term.
Add the search functionality
The database contains 100 travel-related questions, and a web server is now in place to interact with the database. The final step involves handling search requests and responding with the most similar questions from the database.
To achieve that, start by adding the import below to the index.ts file:
import { findSimilarEmbeddings, generateEmbedding } from './helpers'
The code above imports the findSimilarEmbeddings and generateEmbedding helper functions. Next, add the code below to the index.ts file:
app.post('/search', async (req: Request, res: Response) => {
  try {
    const { question } = req.body
    const embedding = await generateEmbedding(question)
    const similarQuestions = await findSimilarEmbeddings(embedding)

    res.render('index', { faqs: similarQuestions })
  } catch (error) {
    console.error(error)
  }
})
The code introduced above defines a route handler to handle POST requests to the /search route. This route is the action URL for the search form on the index page.
When the route matches a request, the code extracts the submitted search term from the request body and generates a vector embedding for the search term using the generateEmbedding function. The findSimilarEmbeddings function then receives the resulting vector embedding, queries the database and returns an array of the top five most similar questions.
Finally, the route handler renders the index view, passing the array of similar questions to the view through a faqs variable. Given that the code within the index view is already set up to use the faqs variable and display the search results in a list, no additional modification is required in the index view.
Test the search functionality locally
To test out the functionality, start up the server by running the command below:
npm run dev
With the app running in the browser, search for a travel-related question such as "What happens if my flight is canceled?". You should see a list of related FAQ questions displayed on the page.
You've successfully integrated a search feature that uses the capabilities of ML/AI to provide results closely tied to the search term. In the upcoming section, you will proceed to deploy the application online on the Koyeb platform.
Deploy to Koyeb
With the app now complete, the final step is to deploy it online on Koyeb. Since the app uses a managed Postgres service, the deployment process doesn't include a database setup.
To get started, update the scripts section of the package.json file with the code below:
"scripts": {
  "test": "echo \"Error: no test specified\" && exit 1",
  "db:setup": "ts-node src/db/schema",
  "db:seed": "ts-node src/db/seed",
  "dev": "nodemon --watch './**/*.ts' --exec ts-node ./src/index.ts",
  "build": "npm run db:setup && npx tsc",
  "start": "node src/index.js"
}
The code above introduced a build and start script to the package.json file. The build script runs the database schema and compiles the TypeScript code into JavaScript. The start script executes the compiled JavaScript code with node.
Next, create a GitHub repository for your code and execute the command below to push your local code to the repository:
git add --all
git commit -m "Complete vector embedding powered FAQ search app."
git remote add origin git@github.com/<YOUR_GITHUB_USERNAME>/<YOUR_REPOSITORY_NAME>.git
git branch -M main
git push -u origin main
To deploy the code on the GitHub repository, visit the Koyeb control panel, and while on the Overview tab, click the Create Web Service button to start the deployment process. On the App deployment page:
- Select GitHub as the deployment method.
- Choose the repository for your code from the repository drop-down menu.
- In the Environment variables and files section, click Add variable. For every environment variable listed in your
.envfile, input the variable name, select the Secret type, and in the value field, choose the Create secret option. In the ensuing form, specify the secret name along with its corresponding value, and finally, click the Create button. Remember to add the?ssl=trueparameter to theDB_URLvalue. - Enter a name for the application or use the provided one.
- Finally, initiate the deployment process by clicking Deploy.
During the deployment on Koyeb, the process identifies the build and start scripts outlined in the package.json file, using them to build and launch the application. The deployment progress can be tracked through the logs presented. Upon the completion of deployment and the successful execution of vital health checks, your application will be operational.
Click on the provided public URL to access your live application.
Conclusion
In this tutorial, you implemented text similarity search in a FAQ search application, leveraging the power of vector embeddings.
The Hugging Face Inference API offers diverse models for various ML/AI tasks. With Koyeb's managed Postgres service supporting the pgvector extension, you can explore the API's offerings and seamlessly integrate ML/AI functionalities into your applications.
Given that the application was deployed using the Git deployment option, subsequent code push to the deployed branch will automatically initiate a new build for your application. Changes to your application will become live once the deployment is successful. In the event of a failed deployment, Koyeb retains the last operational production deployment, ensuring the uninterrupted operation of your application.

